Tuesday, June 29, 2010

my first quilt!

I have a low tolerance for multi-step crafting or sewing projects. I'm an instant gratification kind of girl, which is why I usually stick to smaller things.

Which makes this quilt along kind of torturous. :)

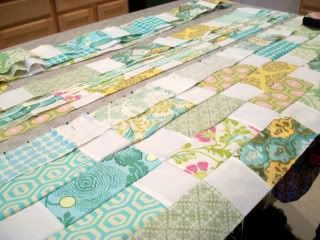
Don't get me wrong, I'm enjoying the sewing and watching my first (okay, second, but I never finished the first one and I can't find it, anyway) quilt come together, but it's taking a REALLY LONG TIME.

I decided last night, right in the middle of sewing quilt strips together, that I needed something super quick to make; a tiny little project that wouldn't detract too much from the big quilt. Plus, I'm a little nervous that I hadn't practiced any important quilting skills (like binding) before.

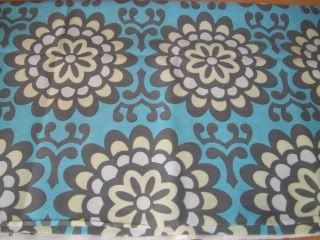
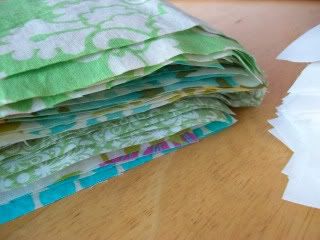
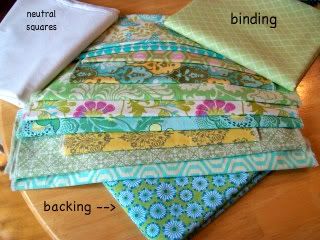
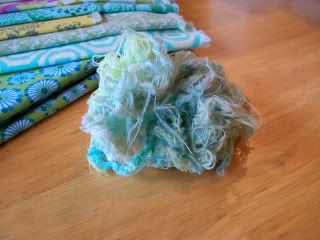
I dug into Ye Olde Crafty Cabinet and found some charm squares I picked up at a local quilt show recently. Voila!

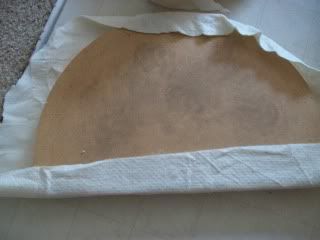
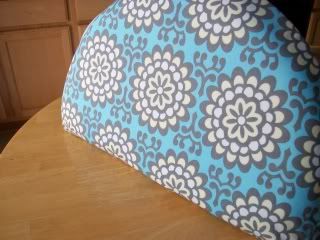
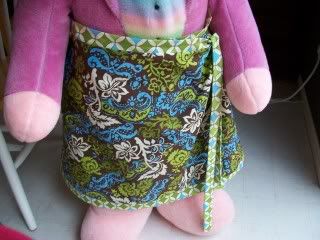
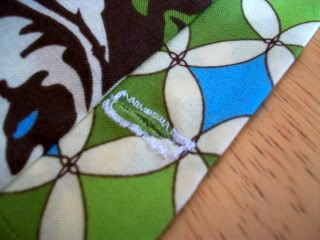
May I present my first completed quilt?

Photobucket


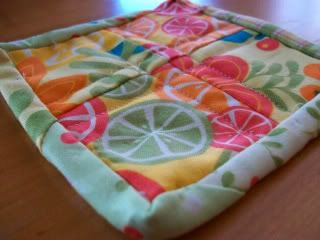
Doesn't it look ginormous? I love the magic of photography. :)

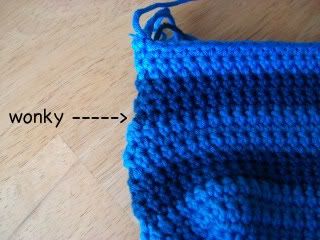
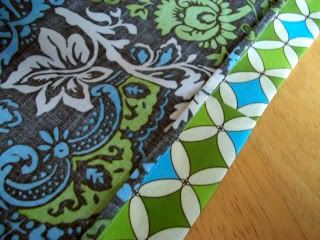
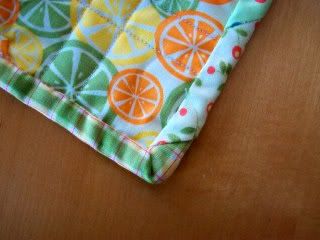
It's actually coaster-size. It didn't take very long and I used the opportunity to practice binding (which turned out okay- check out that corner!). I was also relieved that my sewing machine was able to handle all the layers of fabric and batting.

Photobucket


Yay for useful, tiny projects!

Monday, June 28, 2010

quilt along, week three, part one

Sewing the strips together for the quilt top is currently in progress. I've got six strips sewn together, six more ironed and ready to go, and eight that need to be ironed still.


Photobucket


(Sorry for the craptastic photo. :) But doesn't the quilt top look awesome so far?)

Sunday, June 27, 2010

more fabric flowers

As soon as I put the new table in place in our master bedroom and set the phone down, I knew it needed something else. I decided to make some more fabric flowers, just like I did for my mom for Mother's Day.

I wanted to try different effects with these flowers, so for one I pinked the edges on a straight line, and one with a wavy line.

Photobucket


For this next print, I pinked both edges.

Photobucket


The yellow fabric was a fancy napkin from Target, hence the finished edge on the bottom. I fell in love with the print and have also used it to recover a pillow on our bed. On this one, I frayed the edges by pulling some threads.

Photobucket


I also used some more of Amy Butler's Lotus fabric. Here's the finished bouquet!

Photobucket


Now, my brand new bouquet needed a fancy vase. I didn't want anything too tall or with too wide of a neck. We had this empty Nantucket Nectar bottle I saved after Hubby drank the contents. I loved the shape of the jar but thought it was too plain, so I broke out some hemp cord a friend gave me a while back.

Photobucket


I wrapped the entire bottle with the hemp cord, hot gluing every few rounds to secure it. I love my glue gun. Except when I get burned, like today. And yesterday. And the day before.

Photobucket


Yay! I love how this project turned out. Best of all, I pulled all the materials from... wait for it... my STASH!! :)

Photobucket

Saturday, June 26, 2010

thrifty furniture re-do

I was strolling around Goodwill the other day and came across this awesome table with attached chair... I loved the bones of the piece but it was an outdated shade of oak and the seat was covered in the most awful fabric (along with copious amounts of cat hair).

I thought it was a little much at $35 (for normal Goodwill prices) but didn't want to risk waiting and having someone else snatch it up... so, it became mine! Unfortunately, I forgot to take a full "before" picture, but here's what the cushions looked like:

Photobucket


I brought it home, took off the cushions, and sanded the ugly oaky finish off. Then, I spray painted it black and let it dry overnight.


Photobucket


While it was drying, I recovered the cushions with fabric from Amy Butler's Lotus collection... fabric I've drooled over online, finally bought, and am loving for this project!

Photobucket


I kept the original foam for the cushions since it wasn't in bad shape, but I used a layer of Warm 'N Natural between the foam and the fabric.

Photobucket


See the footprints all over the MDF? Those are mine... it was hard work ripping off the old fabric and staples! I had to brace myself. :)

I ended up using hot glue to recover the cushions... I have a staple gun but can't figure out how to get the staple all the way down! Hot glue was a pretty good substitute.

Photobucket


This piece is so unique and looks fabulous in our master bedroom. Hubby was skeptical at first but admits it turned out nicely.* :)

Photobucket


*See the vase with flowers? That's my next post. :)

Friday, June 25, 2010

quilt along, week two (a little late)

Cutting squares and rectangles took forever! That's always the step I least enjoy in a sewing project. It's done, though... and next, it's on to week three of the quilt along!

Photobucket


Don't forget to see what Nancy and Mia are up to with their quilts!

Friday, June 11, 2010

little gift bag

Remember this? I made it for a friend's birthday. I'm ready to give it to her today and wanted to do a bit of non-traditional wrapping, so I made a little drawstring bag using this tutorial. Very easy to do!

Photobucket


The template for the felt flower came from mmmcrafts. (Larissa at mmmcrafts has some great stuff, go check her out!)

Photobucket


My friend's favorite color is pink, so I incorporated (a lot) of that. This was such a quick little project! Best of all, everything came from my stash... love it. :)

Here's the back of the bag:

Photobucket


All ready to go!

Photobucket

Thursday, June 10, 2010

quilt along, week one

Yay! It's time to start Randi's "On the Road to Spring" quilt along! She has six lessons, one per week, to help you piece, quilt, and bind your own masterpiece. Mia, Nancy, and some of Nancy's friends are joining in on the fun, too!

Week One is all about choosing and preparing the fabrics for the quilt. Here are the fabrics I've chosen:

Photobucket


Lots of blues and greens with a little yellow kicked in for good measure. Some fabrics are Amy Butler, some are from Hobby Lobby, some from JoAnn. I like to mix it up like that. :)

The tutorial instructions include washing, drying, and ironing the fabric. Done and done! Here's the mountain of threads I cut from the edges of the fabrics, too:

Photobucket

Wednesday, June 9, 2010

helping out

Mia wrote a powerful post yesterday. Thanks for sharing this great idea!

Craft Hope Spreading seeds of hope one stitch at a time

Monday, June 7, 2010

to frog or not to frog...

that is the question. This is what I get for letting almost a whole year go by with my Starling Handbag still a work in progress. I picked it back up a few weeks ago, and somewhere along the way I've dropped a stitch, so now my bag's wonky.

Photobucket


I'm having a fierce debate with myself over frogging... I'm over halfway through with the bag and have already frogged part of it once (changed my mind about color order). I'm not sure if the wonkiness is bad enough for me to frog or not such a big deal. Grrr.

ETA 6/9/10: I did it. I frogged all the way back to the 9th row... 16 rows of crochet undone. Lots and lots of crinkly yarn covered my bed. :)

Sunday, June 6, 2010

dude... i made a skirt!

I am so excited to show you my finished skirt! I bought a wrap skirt pattern from Fresh Squeezed Fabrics to participate in Randi's skirt along... which happened on May 26th. Oops.*

Anyhow, Big Bunny is making another appearance to model for us... (I'm playing with photo effects and am trying out the "blurred edges" effect... yes? no?)

ETA 6/9/10: The photo with the blurry edges was a definite NO. It gave me a headache every time I looked at it, so I replaced it with the original photo. :)

Photobucket


Isn't it great? I absolutely LOVE how it turned out. Plus, I learned two new skills I had never tried before in my sewing:

Photobucket


FRENCH SEAMS! I love how it makes it seem more professional-- no ratty edges! (I don't have a serger, or I'd just use that.)

Photobucket


BUTTONHOLES! Admittedly, the buttonhole is not as pretty as it could be, but I think it's not half bad.

Overall, not too shabby for my second wearable sewing project. The first was a knit dress I tried in college... it was so awful! I have definitely come a long way in my sewing!

*Better late than never, right, Mia? :)

Friday, June 4, 2010

if you don't mind...

I'm going to interrupt our regularly scheduled project list for a new project, because I can. :)

While trolling around blogland, I came across a new blog:


There are lots of fun crafty tutorials on this relatively new blog, and I thought this one was particularly neat. In fact, I thought it was so fun, I've already bought the boxes and partially filled them with stuff as my "Back to School" gift for my teaching partners!*

Photobucket

Photobucket

Photobucket


I skipped the ribbon part and bought smaller boxes. WalMart has these little ones for only two dollars each. And yes, I made one for myself, haha. I'll only have two teaching partners next year (instead of three) so it wasn't a big deal to make a third for myself. I filled it with fun stuff from Staples, and each box also has a coordinating permanent marker that I'll tie on with ribbon later. I'll add some chocolates into the empty compartments before school starts, and maybe throw in a Starbucks card to start the year off right. :)**

*Yes, I know, school JUST ended and there's over two months til I go back. Give me some credit for planning and executing really early instead of really late this time.

**The scrapbooking papers came from my endless stash of stuff.