Showing posts with label quilting. Show all posts

Wednesday, April 9, 2014

wip wednesday: lots to do

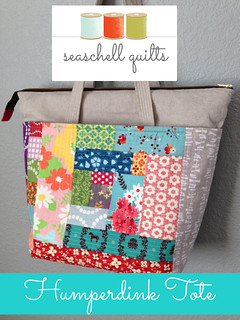
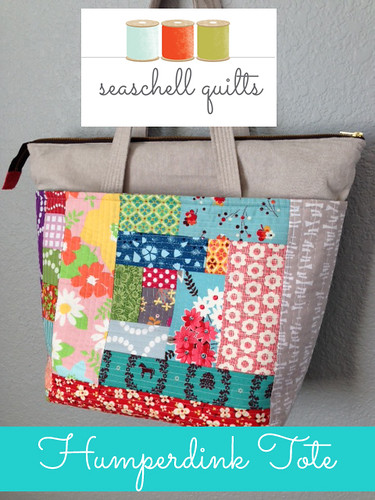
I have several projects in the works but I'm busy riding on the high of releasing my first pattern! The Humperdink Tote is available on Craftsy and you can read more about it in my last post.
Humperdink Tote

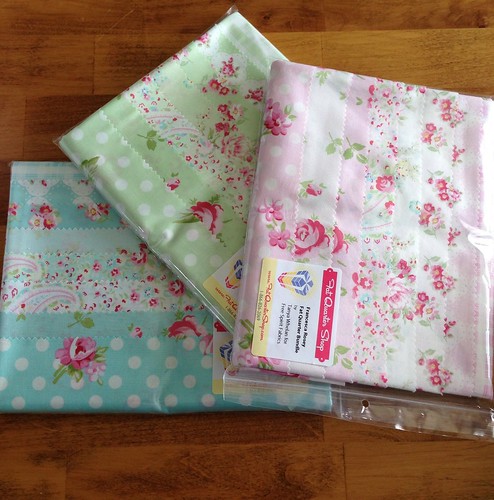
Excitement aside, I really do need to get on the ball because I have two commission quilts to finish er, start. I'm using these soft florals to create an Xs and Os baby quilt for a little girl due in July. I need to add some bright coordinating prints. Any suggestions would be most welcome!
Shabby chic baby quilt

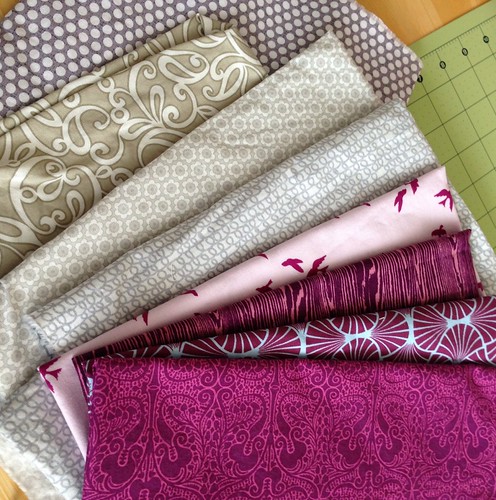
I also have plans to use these purple and silver prints to make an hourglass quilt for another little girl, due in June.
Purple and silver baby quilt
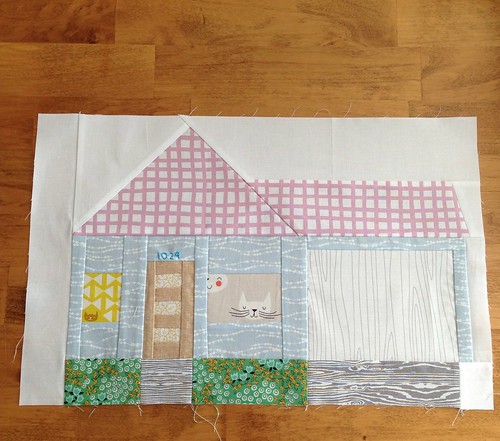
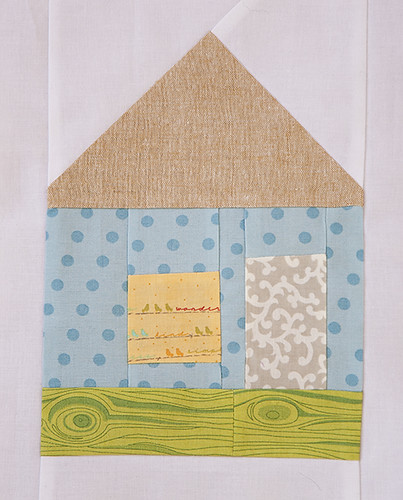
I'm also pleased to have finished a house block for Jamie:
Fcmqg bee house block for jamie
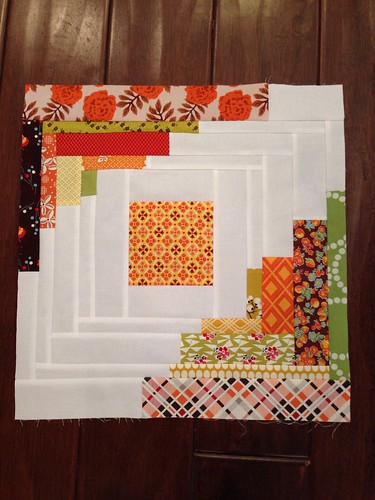
and improv blocks for Hannah,
Block 1 for Hannah fcmqg

Fcmqg bee block 2 for Hannah

which means I've fulfilled my guild bee commitments for this round! We have exciting plans for the next round and I can't wait to start!

I'm linking up today with Freshly Pieced for WIP Wednesday and I Have To Say for Show and Tell Tuesday!

Tuesday, April 8, 2014

open for business!

I'm so excited to announce that I've opened a pattern shop on Craftsy!

My first pattern is the Humperdink Tote! It is a big, zippered tote bag with lots of room for everything! Pack it as a carry-on when traveling, fill it up for a weekend getaway, or put in everything you need for a sewing day with friends.
Humperdink Tote

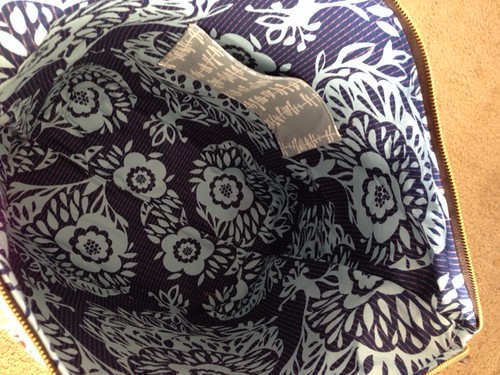
The tote has two big exterior pockets, one small interior pocket, and a zipper that extends on one side so that it fully opens. It measures approximately 15 1/2 inches tall, 20" wide at the top, and 7" deep.

inside humperdink tote

Head over to my Pattern Shop on Craftsy to check it out!

Wednesday, March 26, 2014

wip wednesday: bee block redux

Last year I decided I only wanted to do one bee. More than that and I felt like all my sewing time was spent on making blocks for others.

My local guild, the Fort Collins Modern Quilt Guild, was the perfect choice. Since all the bee mates are friendly, there's no stress if a block is late and best of all, no postage since we just bring them to the meetings.

Here are all the bee blocks I photographed! Sometimes in my haste to finish I fail to take pictures.


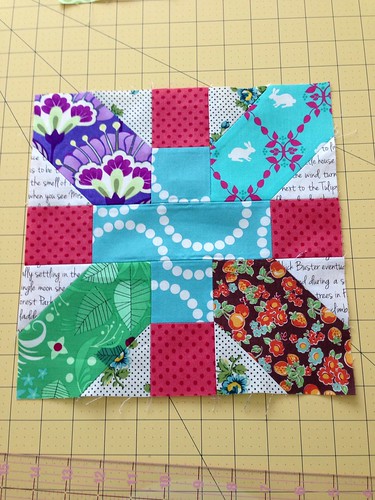
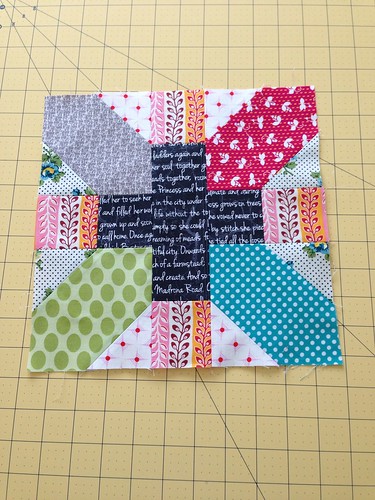
X and + Blocks for Jane:


Fcmqg bee for Jane


Fcmqg bee for Jane


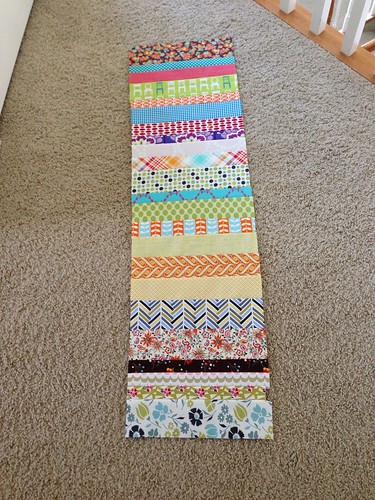
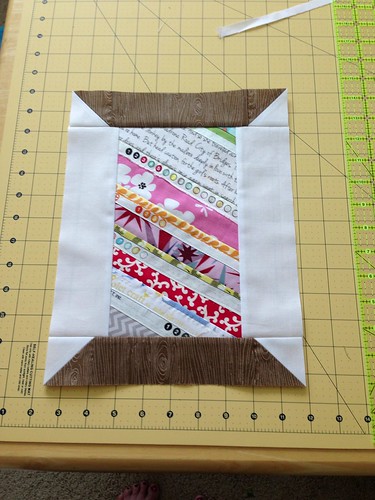
Strip of strips for Michelle:


Fcmqg for Michelle


Spool Block for Beth:


Fcmqg bee for Beth


Converging Corners block for Jody:


Converging corners bee block for Jody


House block for Jamie (Jamie took this photo for me):


quilt houses carmen A mar14


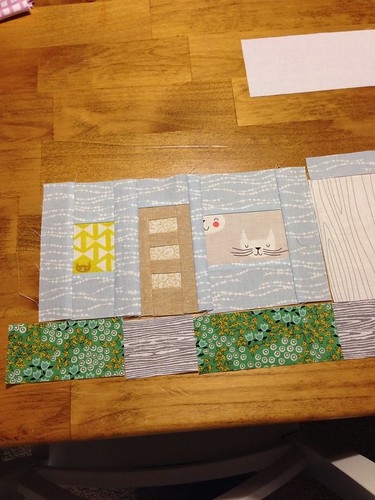
I'm also working on a second block for Jamie:


House 2 for Jamie


The downside of making all these blocks is that I love them so  much I want to make quilts out of them! Linking up with Freshly Pieced for WIP Wednesday.

Friday, September 13, 2013

finish it up friday: a comforting quilt

This is the first time I've made a quilt specifically to comfort someone sick. Without getting into lots of family details, I'll say that my little brother's dad (who is not my dad) is in the hospital, and is supposed to be there for upwards of a month.

Quilt for Rob

The difficult thing is that they both live in Florida while I live in Colorado. That much distance left me feeling helpless to comfort my brother or visit his dad. I spent a few days mulling it over and finally realized I could do something, and I felt silly for not thinking of it sooner.

When I decided to make this quilt it came together pretty quickly. I wanted to keep the piecing simple, so I cut 9" squares from a mix of prints and solids from my stash. (I picked 9" to efficiently cut on the 18" side of the many fat quarter and half yard cuts I used, which is primarily what I buy for my stash.) I wanted the layout to be random, so of course I laid it all out on the guest bed to plan where each square would go. :)

Quilt for Rob

I loosely quilted on each side of every seam, specifically to keep the quilt soft and cozy. It's a nice lap size and I hope it gives my brother's dad comfort.

Quilty Stats
Name: Squares
Pattern: 9" square patchwork
Fabrics: A scrappy mix of prints and Kona solids
Binding: Dulcette Bluestar from Color Me Retro by Jeni Baker
Backing: DS Circle Dot on Grey and JH Posy on Navy
Quilted: on a friend's Juki by me
Dimensions: Approx. 51 x 69

Linking up with Amanda at Crazy Mom Quilts for Finish It Up Friday.

Thursday, September 12, 2013

the tinkertote

I am so, so proud of my dear friend Tara! She released a great class on Craftsy called Quilt As You Go Patchwork Bags!


In this class, Tara guides you through making her fabulous pattern, the Tinkertote. She begins by teaching the Quilt As You Go (QAYG) technique and you practice with a potholder and an optional clutch.

Tinkertote

I tried out lots of different layouts before settling on the fabrics I liked best. I used a lot of my favorite fabrics in this bag, and I really love the scrappy result!

Tinkertote progress!

Tinkertote progress!
 
The class comes with the PDF pattern, materials list, and a list of general instructions. The lessons are easy to follow and Tara explains things so well. I'm really pleased with how my Tinkertote looks!

Tinkertote

I used one of the new Juliana Horner prints from JoAnn for the lining. I followed Tara's lessons for the divided pocket and the zippered pocket on the inside. The zippered pocket was a first for me and it was SO EASY!! I also added a key fob in the seam of the lining so I don't have to rummage around for my car keys while simultaneously holding a squirmy toddler.

Tinkertote

Here's a tip if you choose to do the hidden binding... turn the bag inside out while you're hand stitching at the end! It's so much easier to access the binding at a comfortable angle.
 
Go to Tara's blog for a link to get 25% off the price of the class!

Monday, July 15, 2013

tutorial: embroidered quilt labels

Labeling your finished quilt is very important. It identifies you as the maker and gives details that you might not be able to remember after you've made many! Plus, who knows where that quilt will be in 100 years... I've seen enough vintage quilts to know how great it would be if I knew the stories behind them.

I wanted to create a special label for the quilt I'm submitting to the quilt show in August. This isn't something I'd do for every quilt I make, but this one deserved special treatment.

Materials:
  • solid fabric for label or preprinted label (My finished preprinted label is 4" x 2". You can make your label any size you choose. Don't cut this out of your fabric quite yet, leave it a bigger piece so it will fit in your embroidery hoop!)
  • freezer paper to fit
  • iron
  • scrap paper and pencil (or computer and printer)
  • disappearing ink pen
  • embroidery hoop (mine is 7 inches)
  • embroidery floss
  • needle
  • scissors
  • ruler
  • rotary cutter
  • cutting mat
1. Decide how big your label is going to be. Mine is a preprinted fabric label about 4" x 2", but if you are using a solid then draw a square or rectangle on your fabric lightly with a pencil.

Embroidered quilt label tute

2. Iron freezer paper on the back of your fabric. This will stabilize your fabric so you can write on it. Be sure you lay the shiny side of the paper against the wrong side of the fabric! Otherwise you'll have a mess on your iron.

Embroidered quilt label tute

3. Using the scrap paper and pencil, draw an outline of your label and practice what you want to write. This helps you play with centering words and placement.

Alternatively, you can print something out on your computer to trace if you don't want to embroider your handwriting.  (If you plan to trace you should use a lighter color fabric so you can see what you're tracing through the fabric.)

4. Once you've decided how you want your label to look, use the disappearing ink pen to write on your fabric, using your scrap as a guide or tracing your computer generated piece. (Note: you'll need to embroider soon after writing on your fabric because that disappearing ink goes away within a day or so!)

Embroidered quilt label tute

5. Remove the freezer paper from the back and place the fabric in an embroidery hoop. You can reuse the freezer paper, save it!Separate three strands from your embroidery floss and knot one end.

Embroidered quilt label tute

I used a simple back stitch to embroider my label. I've labeled the picture below to show you the back stitch: Bring the needle up from the back at A, down at B, and back up at C (where you see the needle coming out). To complete the next stitch you would go down at A and come back up past C.

Embroidered quilt label tute

6. After you embroider your label, press out the wrinkles from the embroidery hoop. Then, using a ruler and rotary cutter, cut it out using a 1/4" seam allowance on all sides.

Embroidered quilt label tute

7. Fold the corners over to the back and press down. Then fold the sides in and press, using starch.

Embroidered quilt label tute

Embroidered quilt label tute

Embroidered quilt label tute

8. Pin the label to the quilt back and whip stitch or use an invisible ladder stitch to secure it. There are many tutorials online for the ladder stitch, Google can help! Make sure you only go through the label and the quilt back, not through the front!

Embroidered quilt label tute

And there you go!

  Embroidered quilt label tute

For other quilts I might use the same process but omit the embroidery, instead using a Sharpie or Micron pen to write on the fabric. It does take time but it's worth the effort!

Wednesday, July 3, 2013

wip wednesday: still quilting

I find that I can only quilt in short bits of time. I get bored with the repetitive motions and my neck and back get tense. And finding the time is not easy, which is why it's taking for. ev. er. to quilt my "Oh My Stars" quilt. But I like how it's going, despite the snail's pace! I love stippling with loops... it's a very forgiving pattern.

Oh my stars quilting

I have to get some momentum, though, because this thing has to be DONE by next Thursday! I need to finish my hexy pillows by then, too.

Linking up with Freshly Pieced for WIP Wednesday.

  WIP Wednesday at Freshly Pieced

Friday, June 28, 2013

finish it up friday: a giant finish

This quilt has been in the works since March. It took a lot longer than I thought it would.

Untitled

I was commissioned by my hubby's boss to make this quilt. No pressure there!

Untitled

Stats
Measurements: 96x96 inches
Pattern: Granny Square from Blue Elephant Stitches, done with 5 inch squares
Fabrics: A mish mash of DS, random bits from my stash, and Kona Chocolate. Backed in Riley Blake large brown chevron and bound in brown Heath.
Pieced and quilted by me! (with the help of a long arm machine, haha)

Here it is in action on the long arm... oh boy, that was fun!

Untitled


Linking up with Amanda Jean for Finish It Up Friday!

Wednesday, June 19, 2013

wip wednesday: quilting and binding

I've been working on several projects lately: a quilt for my husband's boss, a quilt for a quilt festival in August, and a pillow from the MQG's Madrona Road Challenge fabric which is also for the quilt festival. I'm getting so close on all three projects!

Last Saturday I rented time on a long arm quilting machine and quilted this massive 96" square quilt for my husband's boss. It looks so good! (I loved using the long arm and can't wait to do it again!) The binding is made for this quilt and just needs to be sewn on.

Untitled

This next quilt is called "Oh My Stars", and is pieced from bee blocks made by the members of the Fort Collins Modern Quilt Guild during my months in 2012 and 2013. We used the Starflower block tutorial from Ellison Lane and then I (with ideas and inspiration from my friend Michelle) assembled the top. I really love how it turned out! I also love that I pieced the back from a rainbow fat quarters from my stash. This quilt is being basted right now, and the binding is ready and waiting, too. I need to get on it already!

Untitled

(The punk has a habit of photo bombing.)

Untitled

Last but not least, I'm working on two pillows from the (#itendedlongagoandthesearewayoverdue) Madrona Road Challenge that was sponsored by the Modern Quilt Guild earlier this year. Our guild plans to have a display of things made from Madrona Road at the quilt festival we are showing at in August.

I decided some English paper piecing (EPP) was in order, so I've got these designs basted and ready to be sewn to their backgrounds:

Untitled

Untitled
 
I probably should have at least ironed the solids before taking these photos. Whoops.
 
Linking up to Freshly Pieced for WIP Wednesday!
 
WIP Wednesday at Freshly Pieced

Monday, February 4, 2013

qayg mini tote

I finished my quilt-as-you-go mini tote and I absolutely love it! It's a great size for me and I'm so pleased at how nicely it came together. I finished it late Friday afternoon and used it that night at a crafty party at my LQS.

This side is my favorite.

Quilted bag side 1

I love the Melody Miller typewriters, and it plays so well with the caramel solid (a bottom-weight cotton fabric from JoAnn that I bought as a remnant a long time ago) as well as the other prints... some of my favorites!

But I love this side, too!

Quilted bag side 2

I used to get nervous about combining prints from differnt lines, but I'm definitely feeling more confident now. I didn't use any interfacing... only batting and more of that bottom-weight fabric as backing to the QAYG panels. It stands up on its own very well.

The finished bag measures 9 inches tall by 8.5 inches wide, and 4 inches deep. The handles are 14.5 inches long. Perfect purse size for me!

Quilted tote inside

I used a magnet closure, it's hidden under the lining. No pockets because I never use them!

That's one more project crossed off the QuiltCon list!

Wednesday, January 30, 2013

wip wednesday: getting ready for quiltcon

I'm so excited for QuiltCon! I've never been to Austin and I hear it's a great city, plus the chance to get away is always fun! My hubby has been so supportive and encouraging when it comes to this trip... I couldn't do it without him! Thanks, honey. :)

In the spirit of travelling handmade, I've got a couple of projects I want to make and take with me: a QAYG tote/handbag, and a duffle bag. I'm finishing the quilt-as-you-go panels for my tote at the moment.

Untitled
 
 
Untitled

And the duffle bag fabric has been picked out, (this is from MoMo's Oh Deer line) but I'm having second thoughts...

Untitled

In fact, I just now went back to my sewing room and decided to use this next fabric, instead!

Untitled

I'll use the same fabric for the handles. Not sure about the lining yet, but I'm much happier with my new choice. The first print seemed a little young for me to be carrying around... I still think it's adorable, though and I'll always love MoMo!

When I reflect on it, I think my original fabric choice has been the hold up on making this bag. I've had the pattern and the fabric since September, but I never jumped in. Now that I'm feeling better about this new print, I feel ready to tackle the bag! Does that happen to anyone else? Does a fabric choice hold you back because it doesn't feel quite right?

Besides my QuiltCon projects, I'm working on several bee blocks. Another round of the 4x5 Modern Quilt Bee has started and I'm working with HSTs...

4x5 hive 9 winter 2013

Plus I joined the Sugar Block Club. This is my first time working with only solids and I'm excited to see how this quilt turns out! Here's January's block...

January Sugar Block Club Snow Blossom block

Are you going to QuiltCon? What are you working on?

Linking up with Lee at Freshly Pieced!

WIP Wednesday at Freshly Pieced