Showing posts with label tutorial or pattern. Show all posts

Sunday, September 21, 2014

tutorial: five minute pillowcase with French seams, envelope style

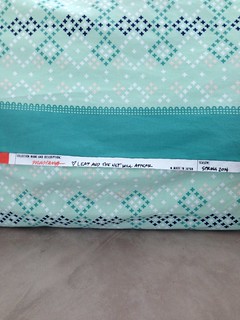
This is a tutorial for a standard size pillow. The selvage runs horizontally across the back of the pillow. I've made several of these and it's a fun way to show off a pretty selvage. The French seams inside keep everything neat and tidy!

What you need:
1 yard of cotton or voile fabric (I prewash mine when making pillowcases)
thread and other sewing notions
sewing machine

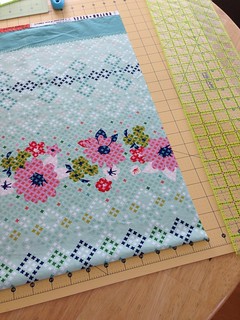
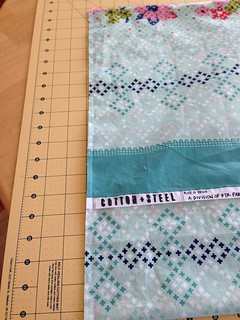
1. Line up your selvages, square the right side of your fabric, and trim to 30 inches long.
Pillowcase tute
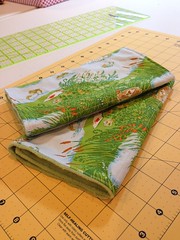
2. Fold the fabric WRONG sides together so that you have a rectangle that measures 19 inches tall by 30 inches wide. Overlap the selvages. Pin raw edges together.
Pillowcase tute
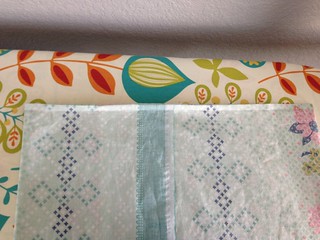
3. Sew along each raw edge with a 3/8" seam allowance. (See above picture.)

4. Turn pillowcase inside out (so now the right sides are together) and poke out corners. Press seams.

5. Sew along each side again, encasing raw edges, with a 1/2" seam allowance.

Pillowcase tute
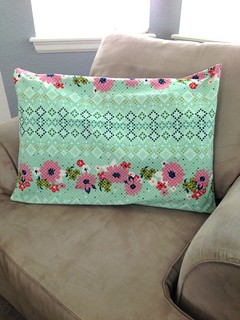
6. Turn pillowcase right side out and press seams. All done!
Pillowcase tute


Pillowcase tute


Monday, August 11, 2014

tutorial: burp cloth, bib, and lovey set for baby

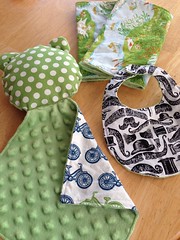
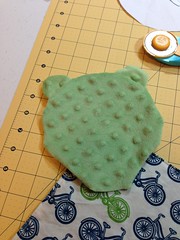
Here's a great little gift set that uses half a yard of quilting cotton plus half a yard of super soft minky, and sews up quickly too! Included are two burp cloths, a bib, and a cozy lovey for baby to snuggle.

Untitled

I'll also give you a couple of tips to make working with slippery minky a lot easier. I've quilted with minky before, and I guest-posted over at Sewtakeahike a couple of years ago about the experience, if you're interested.

On to the tutorial!

Supplies

 
Untitled
 
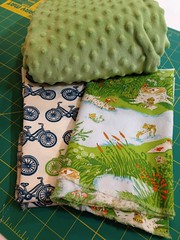
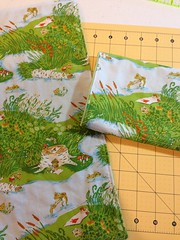
  • Half yard of quilting cotton (I'm using a combination of frogs, bikes, dots, and moustaches)
  • Half yard of minky (I found mine at JoAnn... you can find it with dots, stripes, or stars, and in a variety of colors)
  • Set of snaps or velcro (I used sew on snaps)
  • Pattern for the bib and lovey
  • Scrap of batting
  • Polyester fluff for stuffing
  • Sewing supplies (machine, coordinating thread, hand sewing needle, scissors, rotary cutter and mat)

Notes

I pre-washed and dried the cotton and the minky... I wanted to pre-shrink it (the cotton) and get as much lint off the minky as possible--- I know baby items end up in the wash all the time, so this is a good idea if you'll be giving these as gifts!


Also, this is one of those projects where your sewing machine will thank you for starting with a fresh needle. And a sharp blade on your rotary cutter. Plus, when you're through, make sure you clean the minky lint out of your machine!


The Burp Cloths


Untitled


Having used a lot (and I mean A LOT- Emma spit up regularly as an infant) of burp cloths, I got a good feel for what criteria were necessary to make a good one.


Number one at the top of my must-have list for a burp cloth is multiple layers... it has to be absorbent! I ended up with many burp cloths that were a single knit layer and totally useless after five minutes. Also important is texture... you'll want something nice and soft against baby's skin!

This burp cloth was originally inspired by MADE's tutorial. I changed the measurements to better fit my needs. I also altered the construction a little to make it easier... you'll see how in a minute!


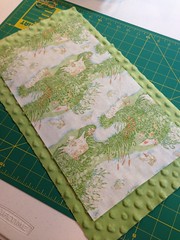
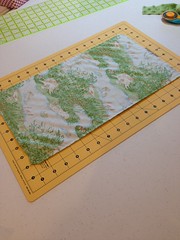
1. Cut two rectangles from your quilting cotton that measure 9 x 16 inches. Cut two rectangles of minky that measure 10 x 17 inches.


Untitled


2. Pin one rectangle of cotton to one rectangle of minky, wrong sides together.

TIP: Originally I cut both pieces the same size, and the minky slid all over the place during pinning and sewing. If you cut the minky bigger, you get a little wiggle room for sliding. But you still need to pin! And pin well! Learn from my mistakes, people. :)


3. Sew around all sides using a 1/4" seam allowance and the edge of the quilting cotton as your guide.

TIP: Use your walking foot, if you have one, and go at a moderate speed. If you go too fast, the minky will really shift everywhere!


Leave a 3" gap on one short end for turning. Trim the excess minky away from the seam allowance. Clip the corners and turn inside out.


I like to use a bone folder to make the corners nice and crisp... it has a nice point like a knitting needle or chopstick but won't go through the corner if I accidentally push too hard.


4. After you poke out the corners, press the burp cloth on the cotton side with your iron on a low setting. Minky is a polyester fabric and not really meant to be ironed, so we're just smoothing out the wrinkly cotton.


5. Pin the opening closed and topstitch around the edge of your burp cloth, about 1/8" away from the edge. This closes the opening at the same time.


6. Fold the burp cloth in thirds and mark the folds. (I used my bone folder to do this, or you could use a hera marker.) Sew on these marked lines. This just makes it easier to fold the burp cloth, plus it minimizes the shifting of the layers.


Untitled


Make the second burp cloth just like the first!


The Bib


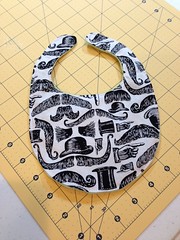
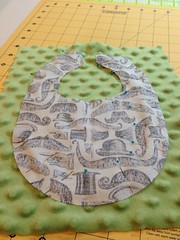
1. Print out the pattern for the bib and cut it out. Lay the template on an 8 x 10" square of quilting cotton and cut around it carefully with your rotary cutter or scissors.


2. Lay the cut piece of cotton on an 8 x 10" square of minky, right sides together. Pin the cotton to the minky. Sew around the edge, using the cotton as your guide, with a 1/4" seam allowance. Leave a 3" gap on one long side of the bib for turning.


Untitled


3. Trim the excess minky away from the edge of the cotton. Clip into the curved edges of the seam allowance (but not all the way!) and trim some bulk around the curved pieces that go around the neck.


4. Turn the bib right side out (I used my bone folder again to get into the narrow channel of the neck straps.)


5. Press the bib on the cotton side.


6. Pin the opening closed and topstitch around the edge of the burpcloth, about 1/8" away from the edge.
7. Sew on the snaps or velcro, following package directions.
Done!

The Lovey
Here's a little secret about loveys... if Mama sleeps with a lovey for a couple of nights, it will take on her scent. This can comfort Baby in his crib at night!

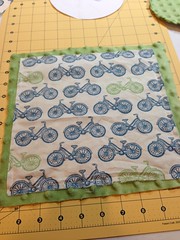
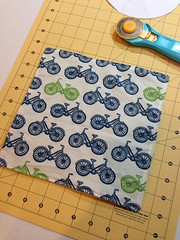
1. The first part is just like making the burp cloth. Cut a piece of cotton 9 x 9 inches and a piece of minky 10 x 10 inches. Center the cotton on the minky, right sides together. Pin, sew around the edge with a 1/4" seam allowance, and leave a 3" opening for turning.
Untitled
2. Trim the extra minky. Clip the corners and turn. Poke out the corners. Iron on the cotton side and pin the opening closed. Topstitch around the edge. This is now called the "lovey blanket". Set aside.
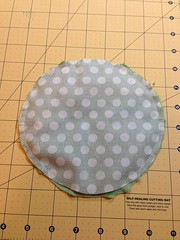
3. Print and cut out the lovey head and ear pattern pieces. Follow the cutting instructions on the pattern page and cut one head from cotton (exact size of template) and one from minky (about 1 inch larger than template all the way around). Also, cut two ears from cotton and two from minky.


4. Pair one cotton ear with one minky ear right sides together. Sew around the curve and clip the curved seam. Turn right side out and finger press. Repeat with other cotton ear and minky ear.


5. Sandwich the ears between the two head pieces which are right sides together. Sew around the cotton head using a 1/4 seam allowance and catching the edges of the ears. Leave a gap for turning. Clip around the head and turn right side out.


6. Stuff the head as firmly as you like. Turn the edges of the open seam under. Insert one corner of the lovey blanket and hand  or machine stitch closed. Make sure the opening is closed securely as these items will be loved and washed regularly!
 

And there you have it!
Untitled
I'd love to know if you use this tutorial to make a gift set for a special baby! Also, if you need clarification on any of the steps, email me and I'm happy to help!

Tuesday, April 8, 2014

open for business!

I'm so excited to announce that I've opened a pattern shop on Craftsy!

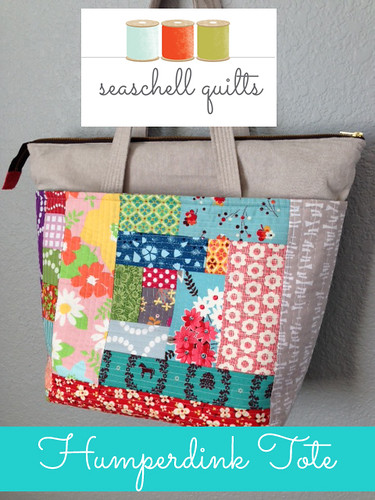
My first pattern is the Humperdink Tote! It is a big, zippered tote bag with lots of room for everything! Pack it as a carry-on when traveling, fill it up for a weekend getaway, or put in everything you need for a sewing day with friends.
Humperdink Tote

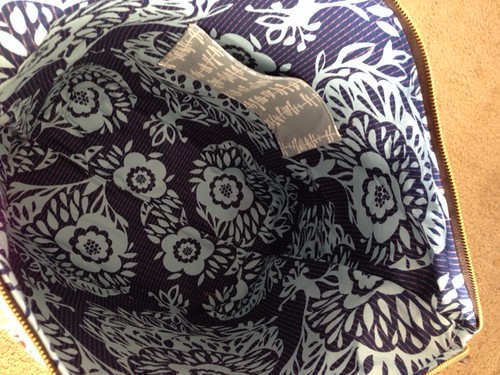
The tote has two big exterior pockets, one small interior pocket, and a zipper that extends on one side so that it fully opens. It measures approximately 15 1/2 inches tall, 20" wide at the top, and 7" deep.

inside humperdink tote

Head over to my Pattern Shop on Craftsy to check it out!

Monday, July 15, 2013

tutorial: embroidered quilt labels

Labeling your finished quilt is very important. It identifies you as the maker and gives details that you might not be able to remember after you've made many! Plus, who knows where that quilt will be in 100 years... I've seen enough vintage quilts to know how great it would be if I knew the stories behind them.

I wanted to create a special label for the quilt I'm submitting to the quilt show in August. This isn't something I'd do for every quilt I make, but this one deserved special treatment.

Materials:
  • solid fabric for label or preprinted label (My finished preprinted label is 4" x 2". You can make your label any size you choose. Don't cut this out of your fabric quite yet, leave it a bigger piece so it will fit in your embroidery hoop!)
  • freezer paper to fit
  • iron
  • scrap paper and pencil (or computer and printer)
  • disappearing ink pen
  • embroidery hoop (mine is 7 inches)
  • embroidery floss
  • needle
  • scissors
  • ruler
  • rotary cutter
  • cutting mat
1. Decide how big your label is going to be. Mine is a preprinted fabric label about 4" x 2", but if you are using a solid then draw a square or rectangle on your fabric lightly with a pencil.

Embroidered quilt label tute

2. Iron freezer paper on the back of your fabric. This will stabilize your fabric so you can write on it. Be sure you lay the shiny side of the paper against the wrong side of the fabric! Otherwise you'll have a mess on your iron.

Embroidered quilt label tute

3. Using the scrap paper and pencil, draw an outline of your label and practice what you want to write. This helps you play with centering words and placement.

Alternatively, you can print something out on your computer to trace if you don't want to embroider your handwriting.  (If you plan to trace you should use a lighter color fabric so you can see what you're tracing through the fabric.)

4. Once you've decided how you want your label to look, use the disappearing ink pen to write on your fabric, using your scrap as a guide or tracing your computer generated piece. (Note: you'll need to embroider soon after writing on your fabric because that disappearing ink goes away within a day or so!)

Embroidered quilt label tute

5. Remove the freezer paper from the back and place the fabric in an embroidery hoop. You can reuse the freezer paper, save it!Separate three strands from your embroidery floss and knot one end.

Embroidered quilt label tute

I used a simple back stitch to embroider my label. I've labeled the picture below to show you the back stitch: Bring the needle up from the back at A, down at B, and back up at C (where you see the needle coming out). To complete the next stitch you would go down at A and come back up past C.

Embroidered quilt label tute

6. After you embroider your label, press out the wrinkles from the embroidery hoop. Then, using a ruler and rotary cutter, cut it out using a 1/4" seam allowance on all sides.

Embroidered quilt label tute

7. Fold the corners over to the back and press down. Then fold the sides in and press, using starch.

Embroidered quilt label tute

Embroidered quilt label tute

Embroidered quilt label tute

8. Pin the label to the quilt back and whip stitch or use an invisible ladder stitch to secure it. There are many tutorials online for the ladder stitch, Google can help! Make sure you only go through the label and the quilt back, not through the front!

Embroidered quilt label tute

And there you go!

  Embroidered quilt label tute

For other quilts I might use the same process but omit the embroidery, instead using a Sharpie or Micron pen to write on the fabric. It does take time but it's worth the effort!

Friday, April 12, 2013

tutorial: english paper piecing with large shapes

There are a lot of English paper piecing tutorials in bloggy land but I haven't found any that address using larger shapes... until now!

English paper piecing (EPP) is a traditional method to piece a quilt by hand. Fabric is wrapped around paper (or sometimes plastic) templates and basted, and then shapes are joined together to make the quilt top (or project).

EPP is great because it's highly portable and a great project to work on anywhere. I've done several projects with EPP and you can see a couple here and here.

I bought a pack of 3 inch hexagon templates (which means that each side measures three inches) and they seemed massive to me since I'm used to EPPing with 1 inch hexies! I discovered that I needed to use different techniques to wrap the fabric taut enough to get the same crisp lines as a smaller shape and thought I'd share them here.

1. Place the template on the fabric (right side down) and cut parallel to the shape's lines about 1/2-5/8" out. With smaller shapes you can use smaller seam allowances, but with shapes this size it's less of a hassle when you have more fabric to work with. Your cutting doesn't have to be perfect.

Paper piecing
 
2. Using Clover Wonder Clips (or other binding clips), anchor the fabric at opposite ends of the shape. With a 1-inch hexagon I would just pin once in the middle, but here that method created too much distortion in the fabric and template, and also left a lot of fabric hanging with nowhere to go.
 
Paper piecing
 
3. Working with one corner at a time, fold the fabric and use clips to hold the fold. Make sure the fabric is taut (but not stretched) across the template. This might seem like overkill, but it really helps the fabric stay put while you're basting and the shape stays flat, too.

Paper piecing

Paper piecing

4. To baste the shape, take multiple stitches on each side.   In the first picture you can see the knot on the right where I started basting. The second picture is the same shape on the opposite side. Make sure you tack down the corners! A thimble really helps here, too.
 
Paper piecing
 
Paper piecing
 
5. Use the Wonder Clips again when you are whip stitching the shapes together. When they are this large it's too easy for them to shift around. 
 
Paper piecing

I hope that helps! I assumed some knowledge of EPP when writing this, so let me know if you have any questions. By the way, if you're looking for more projects with EPP, Hexa-Go-Go is one book I've really loved!
 
Paper piecing

Saturday, April 23, 2011

butterfly wreath

I've seen yarn-wrapped foam wreaths all over the internets, and wanted to make one for the baby's nursery. You can see variations here and here.

I've sort of developed a bit of a butterfly theme in her room, but don't tell my hubby because he'll think that's WAY too girly. :) At any rate, I decided a butterfly wreath would be very sweet on her wall.

I wrapped a 12 inch foam wreath with white yarn, and set about crocheting butterflies. I had a hard time finding a pattern that I really liked. The first one looked too much like a flower,

Photobucket

and the second one was only okay.

Photobucket

This one came close, but it still wasn't perfect. So I tweaked it, and this is what my version looks like...

Photobucket

... and here is the pattern for my version. This is based on this crochet pattern, but it has some definite differences!

Ch 6, join with sl st in 1st ch to form ring.

Ch 5, tr, ch 1, hdc, ch 1, tr, ch 5, sl st in ring.

*Ch 5, sl st in each ch and into ring. Repeat from * once.

Ch 5, tr, ch 1, hdc, ch 1, tr, ch 5, sl st into ring.

Fasten off and weave in ends.
 
I really like how the wreath turned out!

Photobucket

Photobucket

Sunday, November 28, 2010

skinny daisy chain scarf

I am so excited about this... it's my very first tutorial/pattern!

I love scarves in the fall and winter. I'm a scarf-a-holic... my husband is currently researching scarf rehab options for me. He's asked me several times to stop buying/making/otherwise acquiring scarves, but I just can't help myself.

So. Here we go with a scarf pattern, yay!

daisy chain scarf

Skinny Daisy Chain Scarf
This scarf is a great accessory! (totally useless to keep you warm!)

Notes: I used Lion Brand Wool Ease and an H/5mm hook, but you can use any yarn and hook. Gague is not important for this project. I'm assuming you have a basic knowledge of crochet, but if you need help, you can find it here and here.

Ch 4, join to first ch with sl st.

Ch 3, 11 dc into ring, sl st to top of beginning ch 3.

Ch 1, *[sc, hdc, dc, hdc, sc] in next st

sl st in next st.

repeat from * around to create six "petals".

ch 15, and make the loop on your hook big so that you don't pull out any stitches. Cut a long tail for connecting later.

Make 16 of these daisy and chain combinations, and one daisy without the chain. Use the loop you left to slip stitch them together.

Weave in all ends.
 
I also made a headband using this same method... make the flower and crochet the chain as long as you need to go around your head. Slip stitch back to the other side of the flower and there you go!

If you try this pattern out and find any errors, please let me know so I can correct them. Also, I wrote the pattern so that it makes sense to me but may seem to be complete gibberish to you. Let me know if you need clarification. Thank you!