Showing posts with label sewing. Show all posts

Sunday, September 21, 2014

tutorial: five minute pillowcase with French seams, envelope style

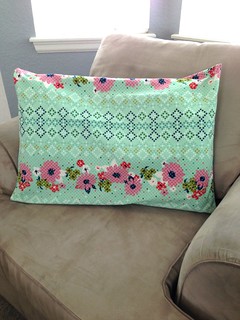
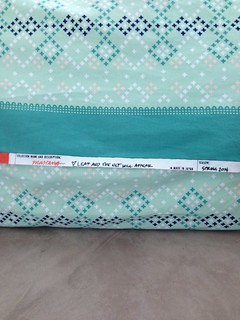
This is a tutorial for a standard size pillow. The selvage runs horizontally across the back of the pillow. I've made several of these and it's a fun way to show off a pretty selvage. The French seams inside keep everything neat and tidy!

What you need:
1 yard of cotton or voile fabric (I prewash mine when making pillowcases)
thread and other sewing notions
sewing machine

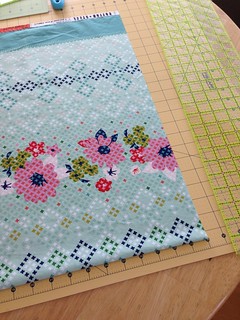
1. Line up your selvages, square the right side of your fabric, and trim to 30 inches long.
Pillowcase tute
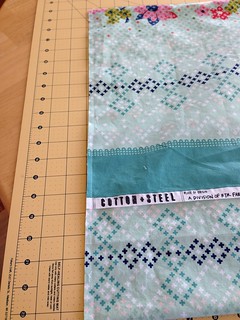
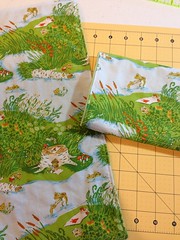
2. Fold the fabric WRONG sides together so that you have a rectangle that measures 19 inches tall by 30 inches wide. Overlap the selvages. Pin raw edges together.
Pillowcase tute
3. Sew along each raw edge with a 3/8" seam allowance. (See above picture.)

4. Turn pillowcase inside out (so now the right sides are together) and poke out corners. Press seams.

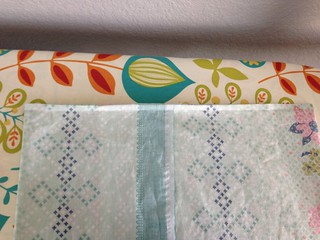
5. Sew along each side again, encasing raw edges, with a 1/2" seam allowance.

Pillowcase tute
6. Turn pillowcase right side out and press seams. All done!
Pillowcase tute


Pillowcase tute


Monday, August 11, 2014

tutorial: burp cloth, bib, and lovey set for baby

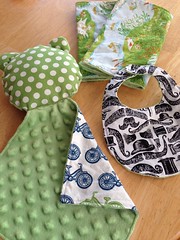
Here's a great little gift set that uses half a yard of quilting cotton plus half a yard of super soft minky, and sews up quickly too! Included are two burp cloths, a bib, and a cozy lovey for baby to snuggle.

Untitled

I'll also give you a couple of tips to make working with slippery minky a lot easier. I've quilted with minky before, and I guest-posted over at Sewtakeahike a couple of years ago about the experience, if you're interested.

On to the tutorial!

Supplies

 
Untitled
 
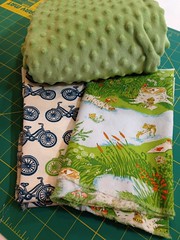
  • Half yard of quilting cotton (I'm using a combination of frogs, bikes, dots, and moustaches)
  • Half yard of minky (I found mine at JoAnn... you can find it with dots, stripes, or stars, and in a variety of colors)
  • Set of snaps or velcro (I used sew on snaps)
  • Pattern for the bib and lovey
  • Scrap of batting
  • Polyester fluff for stuffing
  • Sewing supplies (machine, coordinating thread, hand sewing needle, scissors, rotary cutter and mat)

Notes

I pre-washed and dried the cotton and the minky... I wanted to pre-shrink it (the cotton) and get as much lint off the minky as possible--- I know baby items end up in the wash all the time, so this is a good idea if you'll be giving these as gifts!


Also, this is one of those projects where your sewing machine will thank you for starting with a fresh needle. And a sharp blade on your rotary cutter. Plus, when you're through, make sure you clean the minky lint out of your machine!


The Burp Cloths


Untitled


Having used a lot (and I mean A LOT- Emma spit up regularly as an infant) of burp cloths, I got a good feel for what criteria were necessary to make a good one.


Number one at the top of my must-have list for a burp cloth is multiple layers... it has to be absorbent! I ended up with many burp cloths that were a single knit layer and totally useless after five minutes. Also important is texture... you'll want something nice and soft against baby's skin!

This burp cloth was originally inspired by MADE's tutorial. I changed the measurements to better fit my needs. I also altered the construction a little to make it easier... you'll see how in a minute!


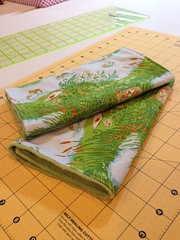
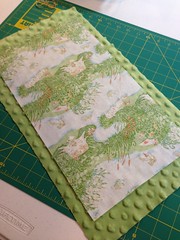
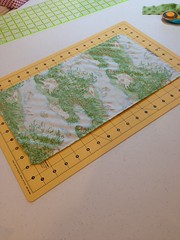
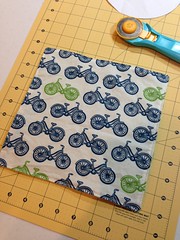
1. Cut two rectangles from your quilting cotton that measure 9 x 16 inches. Cut two rectangles of minky that measure 10 x 17 inches.


Untitled


2. Pin one rectangle of cotton to one rectangle of minky, wrong sides together.

TIP: Originally I cut both pieces the same size, and the minky slid all over the place during pinning and sewing. If you cut the minky bigger, you get a little wiggle room for sliding. But you still need to pin! And pin well! Learn from my mistakes, people. :)


3. Sew around all sides using a 1/4" seam allowance and the edge of the quilting cotton as your guide.

TIP: Use your walking foot, if you have one, and go at a moderate speed. If you go too fast, the minky will really shift everywhere!


Leave a 3" gap on one short end for turning. Trim the excess minky away from the seam allowance. Clip the corners and turn inside out.


I like to use a bone folder to make the corners nice and crisp... it has a nice point like a knitting needle or chopstick but won't go through the corner if I accidentally push too hard.


4. After you poke out the corners, press the burp cloth on the cotton side with your iron on a low setting. Minky is a polyester fabric and not really meant to be ironed, so we're just smoothing out the wrinkly cotton.


5. Pin the opening closed and topstitch around the edge of your burp cloth, about 1/8" away from the edge. This closes the opening at the same time.


6. Fold the burp cloth in thirds and mark the folds. (I used my bone folder to do this, or you could use a hera marker.) Sew on these marked lines. This just makes it easier to fold the burp cloth, plus it minimizes the shifting of the layers.


Untitled


Make the second burp cloth just like the first!


The Bib


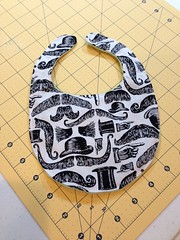
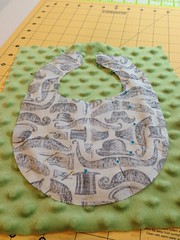
1. Print out the pattern for the bib and cut it out. Lay the template on an 8 x 10" square of quilting cotton and cut around it carefully with your rotary cutter or scissors.


2. Lay the cut piece of cotton on an 8 x 10" square of minky, right sides together. Pin the cotton to the minky. Sew around the edge, using the cotton as your guide, with a 1/4" seam allowance. Leave a 3" gap on one long side of the bib for turning.


Untitled


3. Trim the excess minky away from the edge of the cotton. Clip into the curved edges of the seam allowance (but not all the way!) and trim some bulk around the curved pieces that go around the neck.


4. Turn the bib right side out (I used my bone folder again to get into the narrow channel of the neck straps.)


5. Press the bib on the cotton side.


6. Pin the opening closed and topstitch around the edge of the burpcloth, about 1/8" away from the edge.
7. Sew on the snaps or velcro, following package directions.
Done!

The Lovey
Here's a little secret about loveys... if Mama sleeps with a lovey for a couple of nights, it will take on her scent. This can comfort Baby in his crib at night!

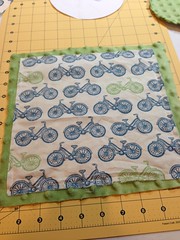
1. The first part is just like making the burp cloth. Cut a piece of cotton 9 x 9 inches and a piece of minky 10 x 10 inches. Center the cotton on the minky, right sides together. Pin, sew around the edge with a 1/4" seam allowance, and leave a 3" opening for turning.
Untitled
2. Trim the extra minky. Clip the corners and turn. Poke out the corners. Iron on the cotton side and pin the opening closed. Topstitch around the edge. This is now called the "lovey blanket". Set aside.
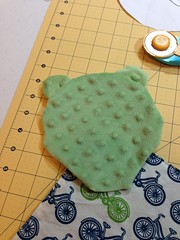
3. Print and cut out the lovey head and ear pattern pieces. Follow the cutting instructions on the pattern page and cut one head from cotton (exact size of template) and one from minky (about 1 inch larger than template all the way around). Also, cut two ears from cotton and two from minky.


4. Pair one cotton ear with one minky ear right sides together. Sew around the curve and clip the curved seam. Turn right side out and finger press. Repeat with other cotton ear and minky ear.


5. Sandwich the ears between the two head pieces which are right sides together. Sew around the cotton head using a 1/4 seam allowance and catching the edges of the ears. Leave a gap for turning. Clip around the head and turn right side out.


6. Stuff the head as firmly as you like. Turn the edges of the open seam under. Insert one corner of the lovey blanket and hand  or machine stitch closed. Make sure the opening is closed securely as these items will be loved and washed regularly!
 

And there you have it!
Untitled
I'd love to know if you use this tutorial to make a gift set for a special baby! Also, if you need clarification on any of the steps, email me and I'm happy to help!

Friday, April 12, 2013

tutorial: english paper piecing with large shapes

There are a lot of English paper piecing tutorials in bloggy land but I haven't found any that address using larger shapes... until now!

English paper piecing (EPP) is a traditional method to piece a quilt by hand. Fabric is wrapped around paper (or sometimes plastic) templates and basted, and then shapes are joined together to make the quilt top (or project).

EPP is great because it's highly portable and a great project to work on anywhere. I've done several projects with EPP and you can see a couple here and here.

I bought a pack of 3 inch hexagon templates (which means that each side measures three inches) and they seemed massive to me since I'm used to EPPing with 1 inch hexies! I discovered that I needed to use different techniques to wrap the fabric taut enough to get the same crisp lines as a smaller shape and thought I'd share them here.

1. Place the template on the fabric (right side down) and cut parallel to the shape's lines about 1/2-5/8" out. With smaller shapes you can use smaller seam allowances, but with shapes this size it's less of a hassle when you have more fabric to work with. Your cutting doesn't have to be perfect.

Paper piecing
 
2. Using Clover Wonder Clips (or other binding clips), anchor the fabric at opposite ends of the shape. With a 1-inch hexagon I would just pin once in the middle, but here that method created too much distortion in the fabric and template, and also left a lot of fabric hanging with nowhere to go.
 
Paper piecing
 
3. Working with one corner at a time, fold the fabric and use clips to hold the fold. Make sure the fabric is taut (but not stretched) across the template. This might seem like overkill, but it really helps the fabric stay put while you're basting and the shape stays flat, too.

Paper piecing

Paper piecing

4. To baste the shape, take multiple stitches on each side.   In the first picture you can see the knot on the right where I started basting. The second picture is the same shape on the opposite side. Make sure you tack down the corners! A thimble really helps here, too.
 
Paper piecing
 
Paper piecing
 
5. Use the Wonder Clips again when you are whip stitching the shapes together. When they are this large it's too easy for them to shift around. 
 
Paper piecing

I hope that helps! I assumed some knowledge of EPP when writing this, so let me know if you have any questions. By the way, if you're looking for more projects with EPP, Hexa-Go-Go is one book I've really loved!
 
Paper piecing

Thursday, March 28, 2013

quiet book, part 2

As promised, here are the details of the quiet book I made for Emma. You can see the post with all of the pictures here. I looked at many, many quiet books (from Pinterest and the Quiet Book Blog) and made a list of the pages I wanted to make:
  • Front Cover Page (includes Emma's name and buttons)
  • Zipper Page (Emma loves zippers!)
  • Barn and Barnyard (two page spread)
  • Felt doll and dress up clothes
  • Shape Page
  • Color Matching Page (with flowers and snaps)
  • Back Cover Page (embroidered with the year)
I went to JoAnn and chose the polyester felt sold by the yard. I bought a quarter yard of almost every color they had, which was more than enough to cut out the pieces I needed. I did buy two and a quarter yards of the white felt since that is the base of every page. I have enough felt left over for three or four more quiet books, but it was cheap and I don't mind adding felt to my stash. :)

Quiet book

Other notions I bought include buttons, snaps, binder rings, and velcro. (I originally intended to use the buttons on an interactive page but scrapped that idea and used them on the front cover instead.) My embroidery floss stash also got a workout with this project!

My pages are 10x10, but I've seen them made in all different sizes. As far as templates, here is a list of what I used and made:
  • Barn, barnyard, and finger puppets: I used the templates from Sunshine, Lollipops, and Rainbows
  • Felt doll and dress up clothes: I drew a doll inspired by this tutorial and freehanded the clothes.
  • Shape page: I printed some shapes using Microsoft Word and used those as templates. (I did the same with Emma's name on the front cover.)
  • Color matching flowers: Used the template from Sunshine, Lollipops, and Rainbows (link above).
Quiet book tips and tricks:
  • I used scotch tape to tape the templates to the felt and cut around them. They stayed put and it made it really easy to get crisp cutting lines in the felt. I also leave the tape on the paper template, which laminates it in a way and makes it easy to use repeatedly.
  • Label your template pieces before you cut them out! That makes it easier to distinguish them should you want to use them again. I note what the piece is, how many to cut out, and from what color.
  • All my used templates are now stored in Ziploc bags in case I need to replace any pieces or want to make another book.
  • I used a layer of interfacing between two layers of felt for removable pieces. This made the pieces less floppy. (see pictures below)
  • I also used interfacing between felt pages that were sewn back to back. Cut these pieces 1/2 inch smaller than your pages. My pages measure 10x10, so I cut my interfacing 9.5x9.5.
  • GO SLOW when sewing your pages back to back! Pinning didn't work well for me (um, I actually didn't try it, lol) and sewing at a moderate speed produced uneven edges. Sewing slowly ensured my pages looked nice!
  • Binder rings made it easy to bind the pages, and it will be simple to remove/add pages in the future. I originally intended to use grommets but ran out of time (I finished it at midnight the night before our trip, lol) so I just cut little slits in the pages.
For removable pieces: Cut out one piece using template. Embroider/decorate as desired. Layer with the piece on top, interfacing in the middle, and the backing felt (larger than the original piece) on the bottom.

Quiet book

Sew around the piece. Using a piece of felt on the back that is bigger means that shifting will not be an issue while sewing.

Quiet book

Trim away the excess interfacing and backing felt.

Quiet book

Monday, March 25, 2013

quiet book, part 1

When we fly with Emma I like to bring something new to entertain her. Last year I made one of those little taggie blankets with bits of ribbon sticking out on all sides.. she loved that! This year, though, we need something a bit more interactive. It also needed to be relatively quiet and not a hundred pieces, since we'd be on a plane in tight quarters.

I went back through my Pinterest boards and looked for something she might like. I had pinned a quiet book a long time ago and went back to the link at Sunshine, Lollipops, and Rainbows to check it out again. It met my requirements and looked like something Emma would enjoy!

Here are the pictures of the quiet book I made. I have more details about how I made the book coming up in another post.

Front cover

Quiet book

Dress up doll

Quiet book

Quiet book

Snappy flowers

Quiet book

Quiet book

Zippers

Quiet book

Shapes

Quiet book

Barn

Quiet book

Barn with doors open, and the barnyard

Quiet book

Back cover

Quiet book

Emma and the quiet book in action on the plane

Quiet book

Wednesday, February 20, 2013

wip wednesday: quiltcon here i come!

QuiltCon is finally here! My friend Michelle and I leave today for Austin, Texas... a city I've heard great things about. I'm excited to learn new things and hopefully make new quilty friends! I'll also be Instagramming all the fun too... I'm @seaschellquilts if you'd like to follow along!

I've been working feverishly to finish some things before leaving for Texas. 4x5 Bee blocks certainly needed to be done as the mailing date is February 23rd, right in the middle of my trip. I managed to squeak those out yesterday and ran them down to the post office.

4x5 bee blocks

But I'm most proud of this finish- a duffle bag to use as my carry-on! I loooooove it!

Duffle bag!

Unfortunately, I ran out of time so I started two other projects that didn't get finished: pajama pants and a bag to hold my cutting mat and rulers Those two WIPs are in pieces scattered around my sewing room, which currently looks as though a fabric bomb went off in it. C'est la vie!

And with that, I'm off!

Linking up with Lee at Freshly Pieced for WIP Wednesday!

WIP Wednesday at Freshly Pieced
 
 
ETA: I'm having trouble with the linky tool on Freshly Pieced, so I probably won't get the chance to link up this week!

Monday, February 4, 2013

qayg mini tote

I finished my quilt-as-you-go mini tote and I absolutely love it! It's a great size for me and I'm so pleased at how nicely it came together. I finished it late Friday afternoon and used it that night at a crafty party at my LQS.

This side is my favorite.

Quilted bag side 1

I love the Melody Miller typewriters, and it plays so well with the caramel solid (a bottom-weight cotton fabric from JoAnn that I bought as a remnant a long time ago) as well as the other prints... some of my favorites!

But I love this side, too!

Quilted bag side 2

I used to get nervous about combining prints from differnt lines, but I'm definitely feeling more confident now. I didn't use any interfacing... only batting and more of that bottom-weight fabric as backing to the QAYG panels. It stands up on its own very well.

The finished bag measures 9 inches tall by 8.5 inches wide, and 4 inches deep. The handles are 14.5 inches long. Perfect purse size for me!

Quilted tote inside

I used a magnet closure, it's hidden under the lining. No pockets because I never use them!

That's one more project crossed off the QuiltCon list!

Wednesday, January 30, 2013

wip wednesday: getting ready for quiltcon

I'm so excited for QuiltCon! I've never been to Austin and I hear it's a great city, plus the chance to get away is always fun! My hubby has been so supportive and encouraging when it comes to this trip... I couldn't do it without him! Thanks, honey. :)

In the spirit of travelling handmade, I've got a couple of projects I want to make and take with me: a QAYG tote/handbag, and a duffle bag. I'm finishing the quilt-as-you-go panels for my tote at the moment.

Untitled
 
 
Untitled

And the duffle bag fabric has been picked out, (this is from MoMo's Oh Deer line) but I'm having second thoughts...

Untitled

In fact, I just now went back to my sewing room and decided to use this next fabric, instead!

Untitled

I'll use the same fabric for the handles. Not sure about the lining yet, but I'm much happier with my new choice. The first print seemed a little young for me to be carrying around... I still think it's adorable, though and I'll always love MoMo!

When I reflect on it, I think my original fabric choice has been the hold up on making this bag. I've had the pattern and the fabric since September, but I never jumped in. Now that I'm feeling better about this new print, I feel ready to tackle the bag! Does that happen to anyone else? Does a fabric choice hold you back because it doesn't feel quite right?

Besides my QuiltCon projects, I'm working on several bee blocks. Another round of the 4x5 Modern Quilt Bee has started and I'm working with HSTs...

4x5 hive 9 winter 2013

Plus I joined the Sugar Block Club. This is my first time working with only solids and I'm excited to see how this quilt turns out! Here's January's block...

January Sugar Block Club Snow Blossom block

Are you going to QuiltCon? What are you working on?

Linking up with Lee at Freshly Pieced!

WIP Wednesday at Freshly Pieced