Showing posts with label bloggy love. Show all posts

Monday, September 23, 2013

for a good cause

***The raffle is now closed. You can still donate to a good cause, though!***

I'm sure by now you've heard about the floods in Colorado. Our family is fine and we personally didn't experience flooding, but many near us have. The devastation left in the wake of the floodwaters is staggering. Clean up and recovery are going to take a lot of time and money.

A member of my quilt guild, Karen, is raffling off a quilt to encourage donations to the local United Way Relief Fund. Please visit her blog for all the info and to enter... the quilt she's giving away is awesome!!

IMG_1460

Friday, September 13, 2013

finish it up friday: a comforting quilt

This is the first time I've made a quilt specifically to comfort someone sick. Without getting into lots of family details, I'll say that my little brother's dad (who is not my dad) is in the hospital, and is supposed to be there for upwards of a month.

Quilt for Rob

The difficult thing is that they both live in Florida while I live in Colorado. That much distance left me feeling helpless to comfort my brother or visit his dad. I spent a few days mulling it over and finally realized I could do something, and I felt silly for not thinking of it sooner.

When I decided to make this quilt it came together pretty quickly. I wanted to keep the piecing simple, so I cut 9" squares from a mix of prints and solids from my stash. (I picked 9" to efficiently cut on the 18" side of the many fat quarter and half yard cuts I used, which is primarily what I buy for my stash.) I wanted the layout to be random, so of course I laid it all out on the guest bed to plan where each square would go. :)

Quilt for Rob

I loosely quilted on each side of every seam, specifically to keep the quilt soft and cozy. It's a nice lap size and I hope it gives my brother's dad comfort.

Quilty Stats
Name: Squares
Pattern: 9" square patchwork
Fabrics: A scrappy mix of prints and Kona solids
Binding: Dulcette Bluestar from Color Me Retro by Jeni Baker
Backing: DS Circle Dot on Grey and JH Posy on Navy
Quilted: on a friend's Juki by me
Dimensions: Approx. 51 x 69

Linking up with Amanda at Crazy Mom Quilts for Finish It Up Friday.

Thursday, September 12, 2013

the tinkertote

I am so, so proud of my dear friend Tara! She released a great class on Craftsy called Quilt As You Go Patchwork Bags!


In this class, Tara guides you through making her fabulous pattern, the Tinkertote. She begins by teaching the Quilt As You Go (QAYG) technique and you practice with a potholder and an optional clutch.

Tinkertote

I tried out lots of different layouts before settling on the fabrics I liked best. I used a lot of my favorite fabrics in this bag, and I really love the scrappy result!

Tinkertote progress!

Tinkertote progress!
 
The class comes with the PDF pattern, materials list, and a list of general instructions. The lessons are easy to follow and Tara explains things so well. I'm really pleased with how my Tinkertote looks!

Tinkertote

I used one of the new Juliana Horner prints from JoAnn for the lining. I followed Tara's lessons for the divided pocket and the zippered pocket on the inside. The zippered pocket was a first for me and it was SO EASY!! I also added a key fob in the seam of the lining so I don't have to rummage around for my car keys while simultaneously holding a squirmy toddler.

Tinkertote

Here's a tip if you choose to do the hidden binding... turn the bag inside out while you're hand stitching at the end! It's so much easier to access the binding at a comfortable angle.
 
Go to Tara's blog for a link to get 25% off the price of the class!

Wednesday, June 19, 2013

wip wednesday: quilting and binding

I've been working on several projects lately: a quilt for my husband's boss, a quilt for a quilt festival in August, and a pillow from the MQG's Madrona Road Challenge fabric which is also for the quilt festival. I'm getting so close on all three projects!

Last Saturday I rented time on a long arm quilting machine and quilted this massive 96" square quilt for my husband's boss. It looks so good! (I loved using the long arm and can't wait to do it again!) The binding is made for this quilt and just needs to be sewn on.

Untitled

This next quilt is called "Oh My Stars", and is pieced from bee blocks made by the members of the Fort Collins Modern Quilt Guild during my months in 2012 and 2013. We used the Starflower block tutorial from Ellison Lane and then I (with ideas and inspiration from my friend Michelle) assembled the top. I really love how it turned out! I also love that I pieced the back from a rainbow fat quarters from my stash. This quilt is being basted right now, and the binding is ready and waiting, too. I need to get on it already!

Untitled

(The punk has a habit of photo bombing.)

Untitled

Last but not least, I'm working on two pillows from the (#itendedlongagoandthesearewayoverdue) Madrona Road Challenge that was sponsored by the Modern Quilt Guild earlier this year. Our guild plans to have a display of things made from Madrona Road at the quilt festival we are showing at in August.

I decided some English paper piecing (EPP) was in order, so I've got these designs basted and ready to be sewn to their backgrounds:

Untitled

Untitled
 
I probably should have at least ironed the solids before taking these photos. Whoops.
 
Linking up to Freshly Pieced for WIP Wednesday!
 
WIP Wednesday at Freshly Pieced

Thursday, March 28, 2013

quiet book, part 2

As promised, here are the details of the quiet book I made for Emma. You can see the post with all of the pictures here. I looked at many, many quiet books (from Pinterest and the Quiet Book Blog) and made a list of the pages I wanted to make:
  • Front Cover Page (includes Emma's name and buttons)
  • Zipper Page (Emma loves zippers!)
  • Barn and Barnyard (two page spread)
  • Felt doll and dress up clothes
  • Shape Page
  • Color Matching Page (with flowers and snaps)
  • Back Cover Page (embroidered with the year)
I went to JoAnn and chose the polyester felt sold by the yard. I bought a quarter yard of almost every color they had, which was more than enough to cut out the pieces I needed. I did buy two and a quarter yards of the white felt since that is the base of every page. I have enough felt left over for three or four more quiet books, but it was cheap and I don't mind adding felt to my stash. :)

Quiet book

Other notions I bought include buttons, snaps, binder rings, and velcro. (I originally intended to use the buttons on an interactive page but scrapped that idea and used them on the front cover instead.) My embroidery floss stash also got a workout with this project!

My pages are 10x10, but I've seen them made in all different sizes. As far as templates, here is a list of what I used and made:
  • Barn, barnyard, and finger puppets: I used the templates from Sunshine, Lollipops, and Rainbows
  • Felt doll and dress up clothes: I drew a doll inspired by this tutorial and freehanded the clothes.
  • Shape page: I printed some shapes using Microsoft Word and used those as templates. (I did the same with Emma's name on the front cover.)
  • Color matching flowers: Used the template from Sunshine, Lollipops, and Rainbows (link above).
Quiet book tips and tricks:
  • I used scotch tape to tape the templates to the felt and cut around them. They stayed put and it made it really easy to get crisp cutting lines in the felt. I also leave the tape on the paper template, which laminates it in a way and makes it easy to use repeatedly.
  • Label your template pieces before you cut them out! That makes it easier to distinguish them should you want to use them again. I note what the piece is, how many to cut out, and from what color.
  • All my used templates are now stored in Ziploc bags in case I need to replace any pieces or want to make another book.
  • I used a layer of interfacing between two layers of felt for removable pieces. This made the pieces less floppy. (see pictures below)
  • I also used interfacing between felt pages that were sewn back to back. Cut these pieces 1/2 inch smaller than your pages. My pages measure 10x10, so I cut my interfacing 9.5x9.5.
  • GO SLOW when sewing your pages back to back! Pinning didn't work well for me (um, I actually didn't try it, lol) and sewing at a moderate speed produced uneven edges. Sewing slowly ensured my pages looked nice!
  • Binder rings made it easy to bind the pages, and it will be simple to remove/add pages in the future. I originally intended to use grommets but ran out of time (I finished it at midnight the night before our trip, lol) so I just cut little slits in the pages.
For removable pieces: Cut out one piece using template. Embroider/decorate as desired. Layer with the piece on top, interfacing in the middle, and the backing felt (larger than the original piece) on the bottom.

Quiet book

Sew around the piece. Using a piece of felt on the back that is bigger means that shifting will not be an issue while sewing.

Quiet book

Trim away the excess interfacing and backing felt.

Quiet book

Monday, March 25, 2013

quiet book, part 1

When we fly with Emma I like to bring something new to entertain her. Last year I made one of those little taggie blankets with bits of ribbon sticking out on all sides.. she loved that! This year, though, we need something a bit more interactive. It also needed to be relatively quiet and not a hundred pieces, since we'd be on a plane in tight quarters.

I went back through my Pinterest boards and looked for something she might like. I had pinned a quiet book a long time ago and went back to the link at Sunshine, Lollipops, and Rainbows to check it out again. It met my requirements and looked like something Emma would enjoy!

Here are the pictures of the quiet book I made. I have more details about how I made the book coming up in another post.

Front cover

Quiet book

Dress up doll

Quiet book

Quiet book

Snappy flowers

Quiet book

Quiet book

Zippers

Quiet book

Shapes

Quiet book

Barn

Quiet book

Barn with doors open, and the barnyard

Quiet book

Back cover

Quiet book

Emma and the quiet book in action on the plane

Quiet book

Wednesday, March 13, 2013

quiltcon recap

It's been a couple of weeks since I've been home but it's taken me that long to write this post and get pictures taken. QuiltCon was AMAZING! I was so grateful my hubby could stay home for a few days to watch the baby so I could go. The next one is in 2015 so anybody who couldn't go this year should start saving now!

We (I flew and roomed with my lovely friend Michelle who needs to put a post on her blog so I can link to it, lol ;) ) got to the Convention Center early Thursday to check in with the registration desk and we got a HUGE goody bag with lots of fun stuff! Fabric, thread, lots of flyers, a project pouch... it weight at least 10 pounds.

QuiltCon 2013

I started the day with a workshop with Mary Fons of Fons & Porter fame. The class description said "Learn patchwork fundamentals as you make a darling, super basic Churn Dash block — or two! Also discover excellent tips for teaching beginning quilters of any age or background." (from quiltcon.com). I thought maybe I could pick up some good info since I'm basically a self-taught quilter, but I already knew everything she said... good that I know the fundamentals but bummed I didn't learn anything new.

There was a materials fee and we were supposed to get three fat quarters and the Fons & Porter Half and Quarter Ruler. I was disappointed because the fat quarters were most definitely not my style (very traditional fabrics) and we weren't able to take the Half and Quarter Ruler home because she wasn't able to get enough rulers for both of the classes she was teaching. We left our addresses with her so she could mail us the ruler. On the plus side, I brought my own fabric to play with and I really did like the ruler ... I made HSTs that didn't need trimming and my block turned out nicely.

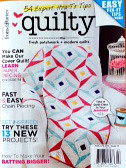
ETA: Mary Fons was unable to get enough rulers for our class so she refunded everyone's materials fee and sent along a free copy of Quilty, her magazine! I thought that was really great of her!

QuiltCon 2013

Thursday afternoon I didn't have a workshop, so I wandered through the quilt show and vendors with friends. There were some beautiful quilts hanging in the show!

QuiltCon 2013

It took me a bit to see the image in this pixelated quilt. I was standing too close! A passerby suggested I move back, and I still couldn't see it until I looked at it through my camera. That's when I saw the beautiful eye... and really understood the amazing quilt I was looking at! Then, the owner of this awesomeness happened to walk by so I snapped a picture of her with her work! The quilt is called Don't Blink, and it was made and quilted by Caro Sheridan. That's Caro up there!

Friday was SUCH a good day! I was particularly excited to be in Lizzy House's Mini Quilt class, mostly because she's one of my favorite designers. She's so passionate about art in all forms and it showed when she was talking about quilting and design. It makes her work even more meaningful!

She led us through several design exercises to get our creative juices flowing. I found them really helpful and ended up designing, piecing, and quilting this mini:

QuiltCon 2013

It measures about 11 inches square and it came out exactly as I'd envisioned. I actually have had this pattern in mind for a couple of weeks now and am interested in making it in a much larger size. The math was a bit tricky but worth it in the end!

I sat next to Rachel from Stitched in Color and we chatted about everything from her online classes to homeschool. She's very friendly and it's always fun to meet somebody from blogland!

Saturday morning I was in Lotta Jansdotter's Textile Printing workshop. Originallly I enrolled this class because I was mildly interested and thought it sounded fun. OH MY GOSH it was so awesome!!

Lotta started by sharing her story of how she came into textile design and then she demonstrated carving and using a stamp.

I went back to my seat with zero idea of what to do so I just started sketching.... one thing I've learned, especially this weekend, is that ideas don't just pop into my head. I need to see/create the evolution of an idea on paper. So that's what I did and ended up carving this stamp:

QuiltCon 2013

I did some stamping and we also created our own stencils... this workshop was only for the morning (and it went so fast) but I could have easily worked on these all day!
Saturday afternoon I ate some yummy barbecue and wandered the quilt show with friends again. I also sat in on a fabric design panel featuring Kim Kight, Kathy Miller from Michael Miller Fabrics, Laurie Wisbrun, a rep from Robert Kaufman Fabrics, and Amy Butler. It was very interesting to hear about the design process from the two designers as well as the production process from the fabric companies. This lecture and several others are available on Craftsy. I also met Laurie that evening and chatted with her about the panel... she was so nice!

By Saturday night I was pretty homesick. It was hard to not see Emma for five days when I spend pretty much every waking moment with her.

Sunday I had an awesome paper piecing class with my lovely friend Penny and her assistant, my lovely friend Tara! This was a design class, so the participants designed their own blocks and began piecing them. I spent a long time staring into space thinking about my design and finally got it down on paper. I'm excited to finish piecing this block!

QuiltCon 2013

The organizers of the event did an amazing job. Thanks to them and to Austin for being a great host city. Can't wait til next time!

If you're thinking of going (and you should!), here are my top three QuiltCon tips:
1. It's so fun to go with friends, but make sure you make new friends too! I  met some very sweet people at QuiltCon.
2. Don't be afraid to try something new! I didn't expect Textile Printing to be as much fun as it was. I'm so glad I signed up for it!
3. Pack an extra bag to bring home all your loot. ;)

Wednesday, February 20, 2013

wip wednesday: quiltcon here i come!

QuiltCon is finally here! My friend Michelle and I leave today for Austin, Texas... a city I've heard great things about. I'm excited to learn new things and hopefully make new quilty friends! I'll also be Instagramming all the fun too... I'm @seaschellquilts if you'd like to follow along!

I've been working feverishly to finish some things before leaving for Texas. 4x5 Bee blocks certainly needed to be done as the mailing date is February 23rd, right in the middle of my trip. I managed to squeak those out yesterday and ran them down to the post office.

4x5 bee blocks

But I'm most proud of this finish- a duffle bag to use as my carry-on! I loooooove it!

Duffle bag!

Unfortunately, I ran out of time so I started two other projects that didn't get finished: pajama pants and a bag to hold my cutting mat and rulers Those two WIPs are in pieces scattered around my sewing room, which currently looks as though a fabric bomb went off in it. C'est la vie!

And with that, I'm off!

Linking up with Lee at Freshly Pieced for WIP Wednesday!

WIP Wednesday at Freshly Pieced
 
 
ETA: I'm having trouble with the linky tool on Freshly Pieced, so I probably won't get the chance to link up this week!

Monday, January 7, 2013

christmas recap

Happy New Year, friends! I hope you and your family had a lovely holiday and a peaceful beginning to 2013.

It's no fun to constantly say "I'm working on stuff for Christmas but I can't show you because I don't want to ruin the surprise." So that's my excuse for not posting the whole month of December. I can't believe I skipped a whole month!

But now that the presents have been revealed to their intended recipients, I can show them here on the blog!

Before I do, though, I wanted to share one thing I started last year that really helped me keep track of everything was a list I called "Project 2012". It's just a Word document that included all my WIPS, all my "want to make" projects, and my crafty commitments as well.

scrnshot2

 I crossed things off as I finished them and things that did not get finished have been moved to my new "Project 2013" list.  All in all, it really helps me see what I accomplished last year!

Okay, here we go... Handmade Christmas!

Super Mario pillow!

My brother-in-law recieved this Super Mario pillow. The funniest thing was he opened it upside down and could not figure out what it was. I finally had to turn it around and pull it back from him a little bit so he could see the whole thing. He liked it, though! And he was gracious enough to leave it with me so I could show it at our quilt guild's show this month... now I just have to send it to him!

I used a tutorial from Cut to Pieces... I pieced the pillow with the individual squares but if I ever did it again I'd do it Angela's way!

Makeup roll from Stitched in Color pattern for Claire's secret Santa!

I used Stitched in Color's Makeup Roll pattern to make this for my quilt guild's Secret Santa partner... I also made her a drawstring bag using In Color Order's tutorial. Both items were quick to make and I liked them so much I need to make both for myself!

Drawstring bag for Claire's secret Santa gift!

Both my mom and mother-in-law recieved baked potato bags. There are tutorials all over the internet, but I based mine off this one.

I need to make one of those for me, too! Part of Emma's gift was supposed to be a doll and doll quilt... The quilt was finished a couple days after Christmas but the doll is still in pieces in my sewing room. Oh well... she loves the quilt!

Untitled

I really love the back, such a cute fabric!

Emma's doll quilt back

Honestly, though, my favorite part of the doll quilt is the binding... not the fabric itself, but the way it's attached!

I used Stitched in Color's zigzag binding tutorial and it looks so much neater than any other way of machine binding I've tried. Of course, nothing beats good old fashioned hand binding but by the time I've pieced and quilted and machined one side of the binding I'm ready to be DONE.

And last but not least, I made stockings for my mother- father-, and brother-in-law, because they were visiting us for Christmas and stockings are part of our family tradition.

stocking for my brother in law


stocking for my mother in law


stocking for my father in law

Tuesday, November 13, 2012

crazy mom quilts retreat 2012

For the third year in a row I was able to spend a weekend sewing with Amanda Jean of crazy mom quilts! She is the co-author of one of my favorite quilting books, Sunday Morning Quilts. I always enjoy hanging out with her and Tara at the fabulous B&B that Tara runs. There is always yummy food, plenty of laughter, and lots of sewing time!

As per usual, my camera stayed stuffed in the bottom of my purse, but I took some pictures of all my goodies as soon as I got home (after I kissed my baby, of course!).

Here's the adorable nametag that Tara made:

crazymomquilts retreat 2012 (1)

And some swag and prizes! I won a a set of Wonder Clips and a fat eighth bundle of Liberty, yay! Plus Amanda signed my copy of her book (which if you've been following Instagram, you'll know I found it just in the nick of time! I'm @seaschellquilts).

We also did a potholder swap... I got the awesome set that Tara made! And I snagged some great scraps out of the scrap bin. Not that I needed more scraps, but who can resist?

crazymomquilts retreat 2012 (3)

This great Liberty tote was part of my fat eighth bundle!

crazymomquilts retreat 2012 (2)

Hannah made this lovely Nicey Jane quilt top at the retreat. Nicey Jane is one of my favorite fabric collections and I reeeally loved this quilt!!! (So I guess I did bring my camera out after all, ha!)

crazymomquilts retreat 2012 (5)

This is what I worked on at the retreat... a curtain for our kitchen window. At night it was very creepy in the kitchen... anyone could see in, but I couldn't see out. Not that people were clamoring to see into my kitchen, lol.

kitchen curtain 1


kitchen curtain 2

I love that it just hangs on clips... no pocket for the rod needed... and I can just push it aside during the day to let in all that great natural light.

kitchen curtain 3
 
I didn't realize how satisfying it would be to have something I made be so functional in the house!