Tuesday, January 5, 2021

my p&p reverie

I read Jane Austen and the Bronte sisters in high school, like many of us did. Jane Eyre was a particular favorite, I recall.

The day after Christmas we were joking about celebrating Boxing Day, which has never been a thing for us, of course, since we aren't British... but that led my train of thought to British literature. I looked at all the e-books that my library offered and decided to reread Pride and Prejudice

Reread it I did, in quick order, and I could not get the story out of my head. Lizzy and Mr. Darcy were stuck there and I wanted MORE. The natural progression is to watch the movie, right? So I watched the 2005 movie with Kiera Knightley and Matthew McFadyen and HOLY SMOKES I loved everything about it! So I watched it again, and again, and well, again. And I downloaded a couple songs from the soundtrack because I loved all the music, too. The last scene, although it is admittedly a departure from the novel, is my favorite. Watching Darcy cross the field to his love was intense, and the speech he makes to Lizzy is beautiful. "You have bewitched me body and soul and I love, I love, I love you. I never wish to be parted from you from this day on." Ahh, my heart!

Then I started watching clips on YouTube (the internet is a spiraling rabbit hole of fun information on all the classics) which led me to the reviews for the 1995 BBC adaptation, so of course I had to watch that too. And of course I loved it. Of course I did. Who doesn't love Colin Firth's Mr. Darcy? Plus it's a six hour mini series that is very close to the novel so you get to see live versions of almost all the scenes in the book. So I watched it again. And, well, again. Yikes. I'm in for a lot of hours of tv at this point. Lest you think I neglected my family, fear not. I totally did. (Thankfully I have an amazing husband. And, by the way, don't bother watching the 1980 adaptation. It was awful.)

It wasn't just the visuals of the films I couldn't get out of my head. I was fully immersed in early 19th century life in Regency-era England. The fashion, the music and dancing, the formalities that have faded away over time. God bless the internet for being a treasure trove of information- tidbits that increase understanding. Life was so different then! I think sometimes that history feels so cold and far in the past, but people loved and laughed and felt all the same emotions we do. I think, too, that it speaks well of Jane Austen that hundreds of years after she wrote the story, it still feels relevant and fresh.

British period dramas get me right in the feels and I love all of them intensely... but this was something I had forgotten until a couple years ago. I was late jumping on the Downton Abbey train but that was such a great series and I was sad when it ended. Now Pride and Prejudice, and a couple days ago I read Sense and Sensibility (I needed a P&P palate cleanser but don't worry, I'm watching it as I write this so my reverie continues unabated.) Watching S&S is next on the list and I've already started rereading Jane Eyre

Now, if only I could stop thinking my thoughts with a British accent, I'd be all set. I'm on the struggle bus with that. A double decker, bright red struggle bus. 


Sunday, September 21, 2014

tutorial: five minute pillowcase with French seams, envelope style

This is a tutorial for a standard size pillow. The selvage runs horizontally across the back of the pillow. I've made several of these and it's a fun way to show off a pretty selvage. The French seams inside keep everything neat and tidy!

What you need:
1 yard of cotton or voile fabric (I prewash mine when making pillowcases)
thread and other sewing notions
sewing machine

1. Line up your selvages, square the right side of your fabric, and trim to 30 inches long.
Pillowcase tute
2. Fold the fabric WRONG sides together so that you have a rectangle that measures 19 inches tall by 30 inches wide. Overlap the selvages. Pin raw edges together.
Pillowcase tute
3. Sew along each raw edge with a 3/8" seam allowance. (See above picture.)

4. Turn pillowcase inside out (so now the right sides are together) and poke out corners. Press seams.

5. Sew along each side again, encasing raw edges, with a 1/2" seam allowance.

Pillowcase tute
6. Turn pillowcase right side out and press seams. All done!
Pillowcase tute


Pillowcase tute


Monday, August 11, 2014

tutorial: burp cloth, bib, and lovey set for baby

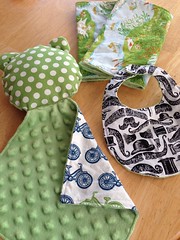
Here's a great little gift set that uses half a yard of quilting cotton plus half a yard of super soft minky, and sews up quickly too! Included are two burp cloths, a bib, and a cozy lovey for baby to snuggle.

Untitled

I'll also give you a couple of tips to make working with slippery minky a lot easier. I've quilted with minky before, and I guest-posted over at Sewtakeahike a couple of years ago about the experience, if you're interested.

On to the tutorial!

Supplies

 
Untitled
 
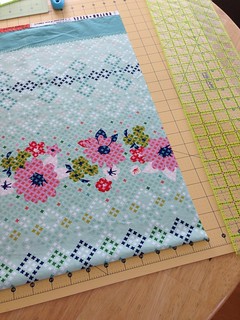
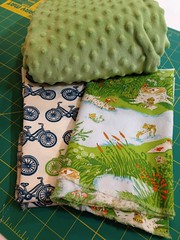
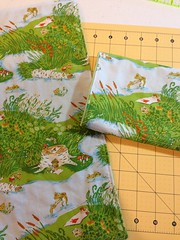
  • Half yard of quilting cotton (I'm using a combination of frogs, bikes, dots, and moustaches)
  • Half yard of minky (I found mine at JoAnn... you can find it with dots, stripes, or stars, and in a variety of colors)
  • Set of snaps or velcro (I used sew on snaps)
  • Pattern for the bib and lovey
  • Scrap of batting
  • Polyester fluff for stuffing
  • Sewing supplies (machine, coordinating thread, hand sewing needle, scissors, rotary cutter and mat)

Notes

I pre-washed and dried the cotton and the minky... I wanted to pre-shrink it (the cotton) and get as much lint off the minky as possible--- I know baby items end up in the wash all the time, so this is a good idea if you'll be giving these as gifts!


Also, this is one of those projects where your sewing machine will thank you for starting with a fresh needle. And a sharp blade on your rotary cutter. Plus, when you're through, make sure you clean the minky lint out of your machine!
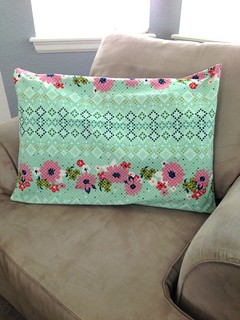


The Burp Cloths


Untitled


Having used a lot (and I mean A LOT- Emma spit up regularly as an infant) of burp cloths, I got a good feel for what criteria were necessary to make a good one.


Number one at the top of my must-have list for a burp cloth is multiple layers... it has to be absorbent! I ended up with many burp cloths that were a single knit layer and totally useless after five minutes. Also important is texture... you'll want something nice and soft against baby's skin!

This burp cloth was originally inspired by MADE's tutorial. I changed the measurements to better fit my needs. I also altered the construction a little to make it easier... you'll see how in a minute!


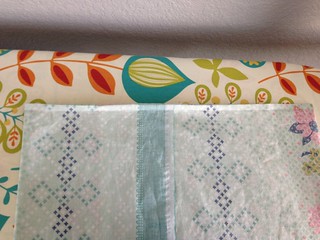
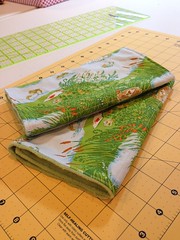
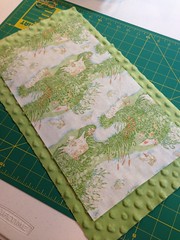
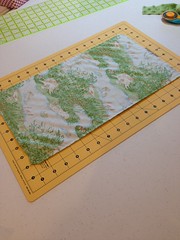
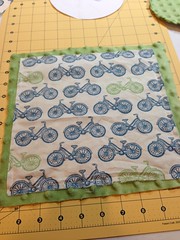
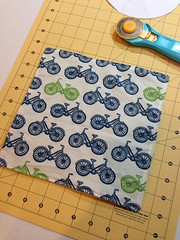
1. Cut two rectangles from your quilting cotton that measure 9 x 16 inches. Cut two rectangles of minky that measure 10 x 17 inches.


Untitled


2. Pin one rectangle of cotton to one rectangle of minky, wrong sides together.

TIP: Originally I cut both pieces the same size, and the minky slid all over the place during pinning and sewing. If you cut the minky bigger, you get a little wiggle room for sliding. But you still need to pin! And pin well! Learn from my mistakes, people. :)


3. Sew around all sides using a 1/4" seam allowance and the edge of the quilting cotton as your guide.

TIP: Use your walking foot, if you have one, and go at a moderate speed. If you go too fast, the minky will really shift everywhere!


Leave a 3" gap on one short end for turning. Trim the excess minky away from the seam allowance. Clip the corners and turn inside out.


I like to use a bone folder to make the corners nice and crisp... it has a nice point like a knitting needle or chopstick but won't go through the corner if I accidentally push too hard.


4. After you poke out the corners, press the burp cloth on the cotton side with your iron on a low setting. Minky is a polyester fabric and not really meant to be ironed, so we're just smoothing out the wrinkly cotton.


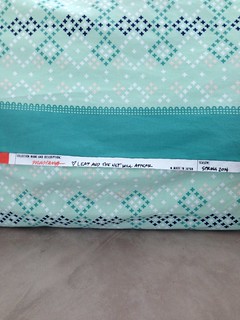
5. Pin the opening closed and topstitch around the edge of your burp cloth, about 1/8" away from the edge. This closes the opening at the same time.


6. Fold the burp cloth in thirds and mark the folds. (I used my bone folder to do this, or you could use a hera marker.) Sew on these marked lines. This just makes it easier to fold the burp cloth, plus it minimizes the shifting of the layers.


Untitled


Make the second burp cloth just like the first!
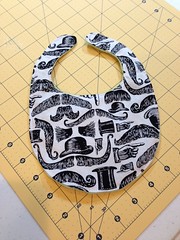


The Bib


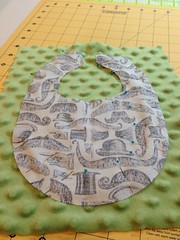
1. Print out the pattern for the bib and cut it out. Lay the template on an 8 x 10" square of quilting cotton and cut around it carefully with your rotary cutter or scissors.


2. Lay the cut piece of cotton on an 8 x 10" square of minky, right sides together. Pin the cotton to the minky. Sew around the edge, using the cotton as your guide, with a 1/4" seam allowance. Leave a 3" gap on one long side of the bib for turning.


Untitled


3. Trim the excess minky away from the edge of the cotton. Clip into the curved edges of the seam allowance (but not all the way!) and trim some bulk around the curved pieces that go around the neck.


4. Turn the bib right side out (I used my bone folder again to get into the narrow channel of the neck straps.)


5. Press the bib on the cotton side.


6. Pin the opening closed and topstitch around the edge of the burpcloth, about 1/8" away from the edge.
7. Sew on the snaps or velcro, following package directions.
Done!

The Lovey
Here's a little secret about loveys... if Mama sleeps with a lovey for a couple of nights, it will take on her scent. This can comfort Baby in his crib at night!

1. The first part is just like making the burp cloth. Cut a piece of cotton 9 x 9 inches and a piece of minky 10 x 10 inches. Center the cotton on the minky, right sides together. Pin, sew around the edge with a 1/4" seam allowance, and leave a 3" opening for turning.
Untitled
2. Trim the extra minky. Clip the corners and turn. Poke out the corners. Iron on the cotton side and pin the opening closed. Topstitch around the edge. This is now called the "lovey blanket". Set aside.
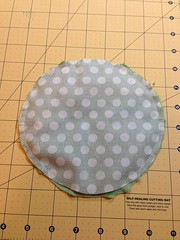
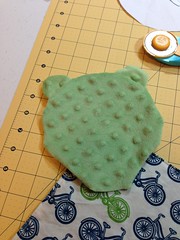
3. Print and cut out the lovey head and ear pattern pieces. Follow the cutting instructions on the pattern page and cut one head from cotton (exact size of template) and one from minky (about 1 inch larger than template all the way around). Also, cut two ears from cotton and two from minky.


4. Pair one cotton ear with one minky ear right sides together. Sew around the curve and clip the curved seam. Turn right side out and finger press. Repeat with other cotton ear and minky ear.


5. Sandwich the ears between the two head pieces which are right sides together. Sew around the cotton head using a 1/4 seam allowance and catching the edges of the ears. Leave a gap for turning. Clip around the head and turn right side out.


6. Stuff the head as firmly as you like. Turn the edges of the open seam under. Insert one corner of the lovey blanket and hand  or machine stitch closed. Make sure the opening is closed securely as these items will be loved and washed regularly!
 

And there you have it!
Untitled
I'd love to know if you use this tutorial to make a gift set for a special baby! Also, if you need clarification on any of the steps, email me and I'm happy to help!

Wednesday, April 9, 2014

wip wednesday: lots to do

I have several projects in the works but I'm busy riding on the high of releasing my first pattern! The Humperdink Tote is available on Craftsy and you can read more about it in my last post.
Humperdink Tote

Excitement aside, I really do need to get on the ball because I have two commission quilts to finish er, start. I'm using these soft florals to create an Xs and Os baby quilt for a little girl due in July. I need to add some bright coordinating prints. Any suggestions would be most welcome!
Shabby chic baby quilt

I also have plans to use these purple and silver prints to make an hourglass quilt for another little girl, due in June.
Purple and silver baby quilt
I'm also pleased to have finished a house block for Jamie:
Fcmqg bee house block for jamie
and improv blocks for Hannah,
Block 1 for Hannah fcmqg

Fcmqg bee block 2 for Hannah

which means I've fulfilled my guild bee commitments for this round! We have exciting plans for the next round and I can't wait to start!

I'm linking up today with Freshly Pieced for WIP Wednesday and I Have To Say for Show and Tell Tuesday!

Tuesday, April 8, 2014

open for business!

I'm so excited to announce that I've opened a pattern shop on Craftsy!

My first pattern is the Humperdink Tote! It is a big, zippered tote bag with lots of room for everything! Pack it as a carry-on when traveling, fill it up for a weekend getaway, or put in everything you need for a sewing day with friends.
Humperdink Tote

The tote has two big exterior pockets, one small interior pocket, and a zipper that extends on one side so that it fully opens. It measures approximately 15 1/2 inches tall, 20" wide at the top, and 7" deep.

inside humperdink tote

Head over to my Pattern Shop on Craftsy to check it out!

Wednesday, March 26, 2014

wip wednesday: bee block redux

Last year I decided I only wanted to do one bee. More than that and I felt like all my sewing time was spent on making blocks for others.

My local guild, the Fort Collins Modern Quilt Guild, was the perfect choice. Since all the bee mates are friendly, there's no stress if a block is late and best of all, no postage since we just bring them to the meetings.

Here are all the bee blocks I photographed! Sometimes in my haste to finish I fail to take pictures.


X and + Blocks for Jane:


Fcmqg bee for Jane


Fcmqg bee for Jane


Strip of strips for Michelle:


Fcmqg for Michelle


Spool Block for Beth:


Fcmqg bee for Beth


Converging Corners block for Jody:


Converging corners bee block for Jody


House block for Jamie (Jamie took this photo for me):


quilt houses carmen A mar14


I'm also working on a second block for Jamie:


House 2 for Jamie


The downside of making all these blocks is that I love them so  much I want to make quilts out of them! Linking up with Freshly Pieced for WIP Wednesday.

Friday, March 14, 2014

published!

I'm so excited to share that I've had a quilt design published in a magazine for the first time!


Quilty Magazine published my design in their March/April 2014 issue. It's called Garden Path. 


I used Michael Miller Cotton Couture Solids for the first time and they were lovely to work with. Soft but not slippery- they have a great hand to them. 

This accomplishment comes with a bit of bitter sweetness- I found out it was accepted the day after my dad passed away last year. He would have been so proud. I wish he was here to share this with, but he's with God and that's comforting. 

I know there's been radio silence on the blog for a while, but I have things up my sleeve- fun stuff is coming!

Monday, September 23, 2013

for a good cause

***The raffle is now closed. You can still donate to a good cause, though!***

I'm sure by now you've heard about the floods in Colorado. Our family is fine and we personally didn't experience flooding, but many near us have. The devastation left in the wake of the floodwaters is staggering. Clean up and recovery are going to take a lot of time and money.

A member of my quilt guild, Karen, is raffling off a quilt to encourage donations to the local United Way Relief Fund. Please visit her blog for all the info and to enter... the quilt she's giving away is awesome!!

IMG_1460

Friday, September 13, 2013

finish it up friday: a comforting quilt

This is the first time I've made a quilt specifically to comfort someone sick. Without getting into lots of family details, I'll say that my little brother's dad (who is not my dad) is in the hospital, and is supposed to be there for upwards of a month.

Quilt for Rob

The difficult thing is that they both live in Florida while I live in Colorado. That much distance left me feeling helpless to comfort my brother or visit his dad. I spent a few days mulling it over and finally realized I could do something, and I felt silly for not thinking of it sooner.

When I decided to make this quilt it came together pretty quickly. I wanted to keep the piecing simple, so I cut 9" squares from a mix of prints and solids from my stash. (I picked 9" to efficiently cut on the 18" side of the many fat quarter and half yard cuts I used, which is primarily what I buy for my stash.) I wanted the layout to be random, so of course I laid it all out on the guest bed to plan where each square would go. :)

Quilt for Rob

I loosely quilted on each side of every seam, specifically to keep the quilt soft and cozy. It's a nice lap size and I hope it gives my brother's dad comfort.

Quilty Stats
Name: Squares
Pattern: 9" square patchwork
Fabrics: A scrappy mix of prints and Kona solids
Binding: Dulcette Bluestar from Color Me Retro by Jeni Baker
Backing: DS Circle Dot on Grey and JH Posy on Navy
Quilted: on a friend's Juki by me
Dimensions: Approx. 51 x 69

Linking up with Amanda at Crazy Mom Quilts for Finish It Up Friday.

Thursday, September 12, 2013

the tinkertote

I am so, so proud of my dear friend Tara! She released a great class on Craftsy called Quilt As You Go Patchwork Bags!


In this class, Tara guides you through making her fabulous pattern, the Tinkertote. She begins by teaching the Quilt As You Go (QAYG) technique and you practice with a potholder and an optional clutch.

Tinkertote

I tried out lots of different layouts before settling on the fabrics I liked best. I used a lot of my favorite fabrics in this bag, and I really love the scrappy result!

Tinkertote progress!

Tinkertote progress!
 
The class comes with the PDF pattern, materials list, and a list of general instructions. The lessons are easy to follow and Tara explains things so well. I'm really pleased with how my Tinkertote looks!

Tinkertote

I used one of the new Juliana Horner prints from JoAnn for the lining. I followed Tara's lessons for the divided pocket and the zippered pocket on the inside. The zippered pocket was a first for me and it was SO EASY!! I also added a key fob in the seam of the lining so I don't have to rummage around for my car keys while simultaneously holding a squirmy toddler.

Tinkertote

Here's a tip if you choose to do the hidden binding... turn the bag inside out while you're hand stitching at the end! It's so much easier to access the binding at a comfortable angle.
 
Go to Tara's blog for a link to get 25% off the price of the class!