Monday, September 23, 2013

for a good cause

***The raffle is now closed. You can still donate to a good cause, though!***

I'm sure by now you've heard about the floods in Colorado. Our family is fine and we personally didn't experience flooding, but many near us have. The devastation left in the wake of the floodwaters is staggering. Clean up and recovery are going to take a lot of time and money.

A member of my quilt guild, Karen, is raffling off a quilt to encourage donations to the local United Way Relief Fund. Please visit her blog for all the info and to enter... the quilt she's giving away is awesome!!

IMG_1460

Friday, September 13, 2013

finish it up friday: a comforting quilt

This is the first time I've made a quilt specifically to comfort someone sick. Without getting into lots of family details, I'll say that my little brother's dad (who is not my dad) is in the hospital, and is supposed to be there for upwards of a month.

Quilt for Rob

The difficult thing is that they both live in Florida while I live in Colorado. That much distance left me feeling helpless to comfort my brother or visit his dad. I spent a few days mulling it over and finally realized I could do something, and I felt silly for not thinking of it sooner.

When I decided to make this quilt it came together pretty quickly. I wanted to keep the piecing simple, so I cut 9" squares from a mix of prints and solids from my stash. (I picked 9" to efficiently cut on the 18" side of the many fat quarter and half yard cuts I used, which is primarily what I buy for my stash.) I wanted the layout to be random, so of course I laid it all out on the guest bed to plan where each square would go. :)

Quilt for Rob

I loosely quilted on each side of every seam, specifically to keep the quilt soft and cozy. It's a nice lap size and I hope it gives my brother's dad comfort.

Quilty Stats
Name: Squares
Pattern: 9" square patchwork
Fabrics: A scrappy mix of prints and Kona solids
Binding: Dulcette Bluestar from Color Me Retro by Jeni Baker
Backing: DS Circle Dot on Grey and JH Posy on Navy
Quilted: on a friend's Juki by me
Dimensions: Approx. 51 x 69

Linking up with Amanda at Crazy Mom Quilts for Finish It Up Friday.

Thursday, September 12, 2013

the tinkertote

I am so, so proud of my dear friend Tara! She released a great class on Craftsy called Quilt As You Go Patchwork Bags!


In this class, Tara guides you through making her fabulous pattern, the Tinkertote. She begins by teaching the Quilt As You Go (QAYG) technique and you practice with a potholder and an optional clutch.

Tinkertote

I tried out lots of different layouts before settling on the fabrics I liked best. I used a lot of my favorite fabrics in this bag, and I really love the scrappy result!

Tinkertote progress!

Tinkertote progress!
 
The class comes with the PDF pattern, materials list, and a list of general instructions. The lessons are easy to follow and Tara explains things so well. I'm really pleased with how my Tinkertote looks!

Tinkertote

I used one of the new Juliana Horner prints from JoAnn for the lining. I followed Tara's lessons for the divided pocket and the zippered pocket on the inside. The zippered pocket was a first for me and it was SO EASY!! I also added a key fob in the seam of the lining so I don't have to rummage around for my car keys while simultaneously holding a squirmy toddler.

Tinkertote

Here's a tip if you choose to do the hidden binding... turn the bag inside out while you're hand stitching at the end! It's so much easier to access the binding at a comfortable angle.
 
Go to Tara's blog for a link to get 25% off the price of the class!

Monday, July 15, 2013

tutorial: embroidered quilt labels

Labeling your finished quilt is very important. It identifies you as the maker and gives details that you might not be able to remember after you've made many! Plus, who knows where that quilt will be in 100 years... I've seen enough vintage quilts to know how great it would be if I knew the stories behind them.

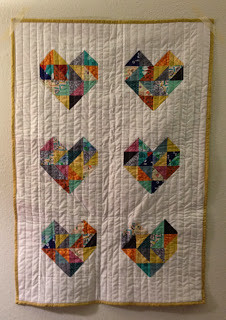
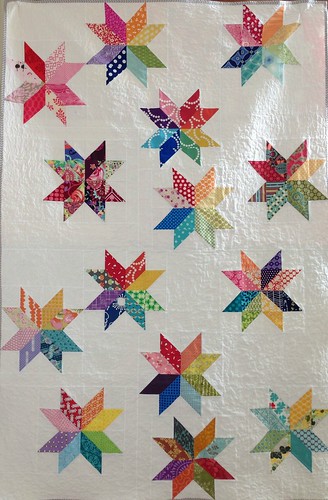
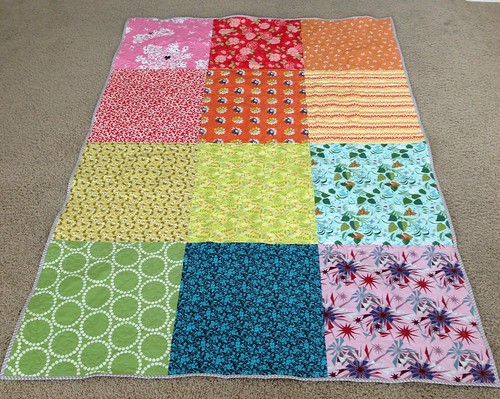
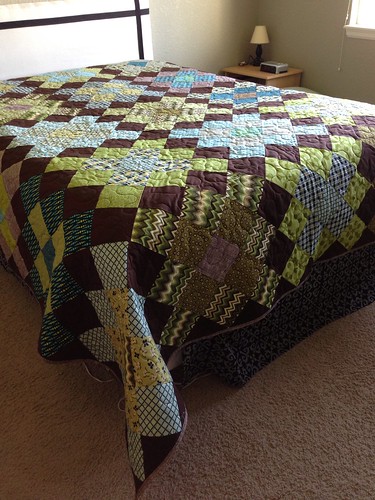
I wanted to create a special label for the quilt I'm submitting to the quilt show in August. This isn't something I'd do for every quilt I make, but this one deserved special treatment.

Materials:
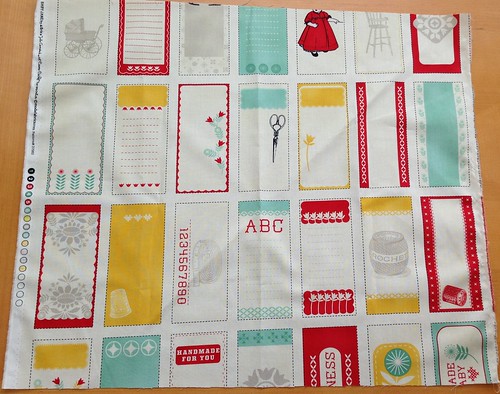
  • solid fabric for label or preprinted label (My finished preprinted label is 4" x 2". You can make your label any size you choose. Don't cut this out of your fabric quite yet, leave it a bigger piece so it will fit in your embroidery hoop!)
  • freezer paper to fit
  • iron
  • scrap paper and pencil (or computer and printer)
  • disappearing ink pen
  • embroidery hoop (mine is 7 inches)
  • embroidery floss
  • needle
  • scissors
  • ruler
  • rotary cutter
  • cutting mat
1. Decide how big your label is going to be. Mine is a preprinted fabric label about 4" x 2", but if you are using a solid then draw a square or rectangle on your fabric lightly with a pencil.

Embroidered quilt label tute

2. Iron freezer paper on the back of your fabric. This will stabilize your fabric so you can write on it. Be sure you lay the shiny side of the paper against the wrong side of the fabric! Otherwise you'll have a mess on your iron.

Embroidered quilt label tute

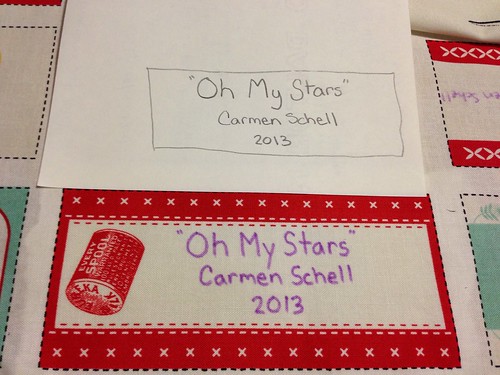
3. Using the scrap paper and pencil, draw an outline of your label and practice what you want to write. This helps you play with centering words and placement.

Alternatively, you can print something out on your computer to trace if you don't want to embroider your handwriting.  (If you plan to trace you should use a lighter color fabric so you can see what you're tracing through the fabric.)

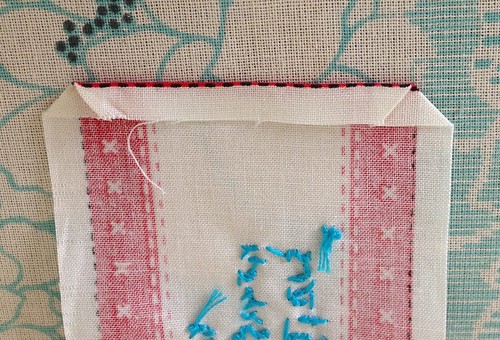
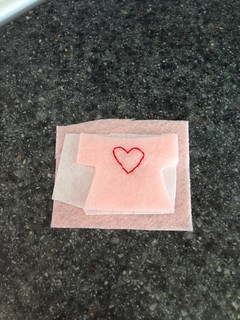
4. Once you've decided how you want your label to look, use the disappearing ink pen to write on your fabric, using your scrap as a guide or tracing your computer generated piece. (Note: you'll need to embroider soon after writing on your fabric because that disappearing ink goes away within a day or so!)

Embroidered quilt label tute

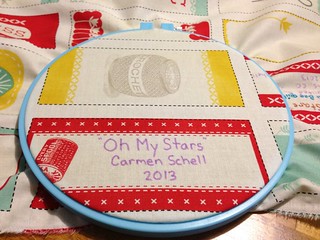
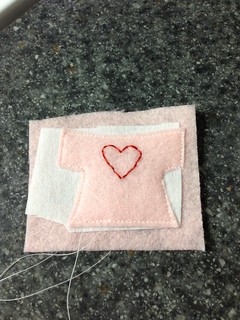
5. Remove the freezer paper from the back and place the fabric in an embroidery hoop. You can reuse the freezer paper, save it!Separate three strands from your embroidery floss and knot one end.

Embroidered quilt label tute

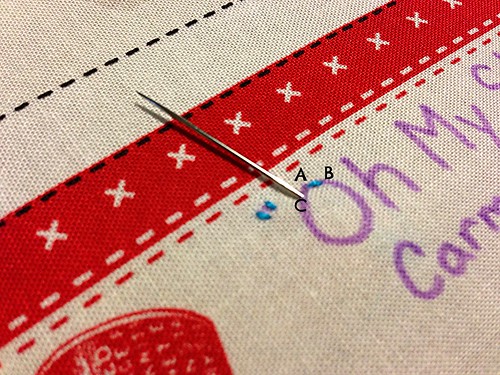
I used a simple back stitch to embroider my label. I've labeled the picture below to show you the back stitch: Bring the needle up from the back at A, down at B, and back up at C (where you see the needle coming out). To complete the next stitch you would go down at A and come back up past C.

Embroidered quilt label tute

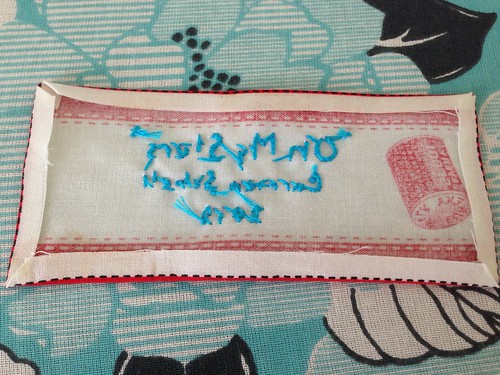
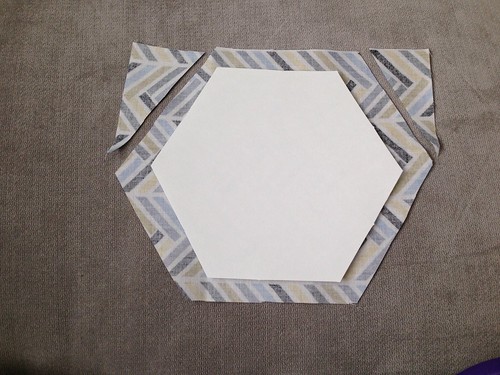
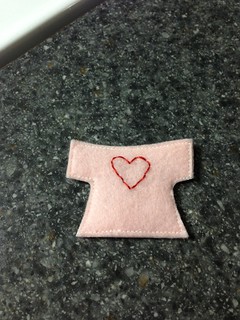
6. After you embroider your label, press out the wrinkles from the embroidery hoop. Then, using a ruler and rotary cutter, cut it out using a 1/4" seam allowance on all sides.

Embroidered quilt label tute

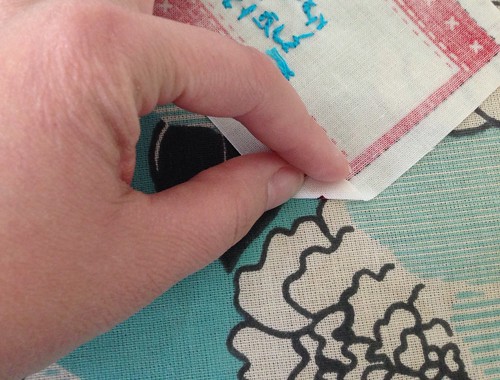
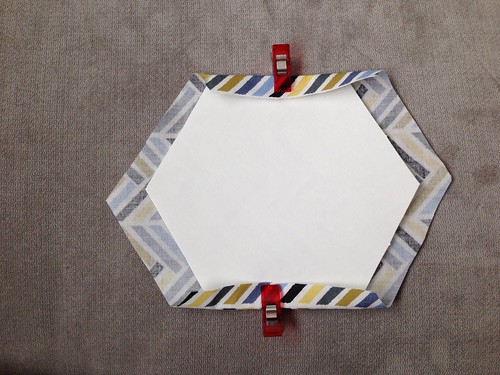
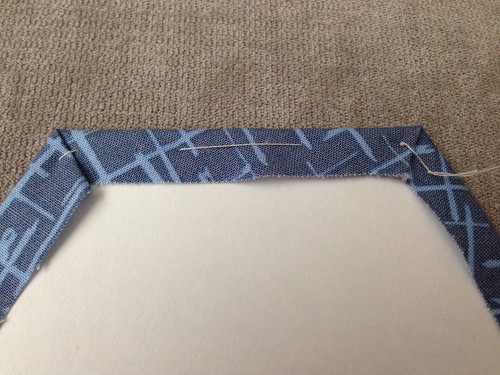
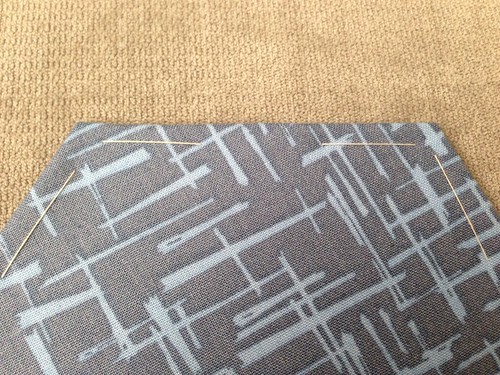
7. Fold the corners over to the back and press down. Then fold the sides in and press, using starch.

Embroidered quilt label tute

Embroidered quilt label tute

Embroidered quilt label tute

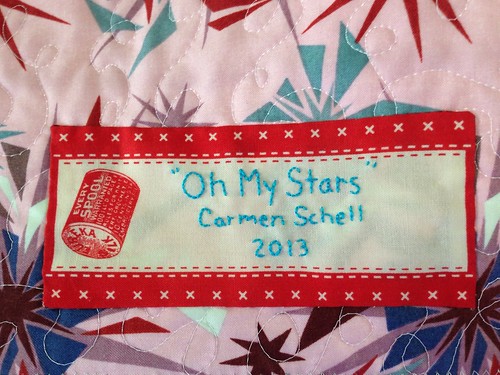
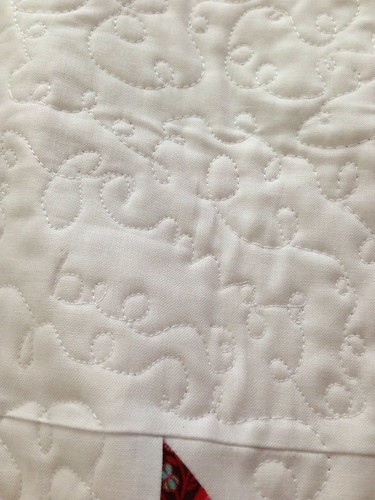
8. Pin the label to the quilt back and whip stitch or use an invisible ladder stitch to secure it. There are many tutorials online for the ladder stitch, Google can help! Make sure you only go through the label and the quilt back, not through the front!

Embroidered quilt label tute

And there you go!

  Embroidered quilt label tute

For other quilts I might use the same process but omit the embroidery, instead using a Sharpie or Micron pen to write on the fabric. It does take time but it's worth the effort!

Friday, July 12, 2013

finish it up friday: oh my stars!

Oh my stars, it's done (as of about 15 minutes ago)! I'm so pleased with this finish!

Oh my stars quilt
 

Oh my stars quilt

This quilt is going to show at the Rocky Mountain Quilt Festival in August, as part of a display of quilts made by members of our quilt guild. It was well received at last night's guild meeting, even with the binding only half done! I still need to make a hanging sleeve and add a label.

I bought this adorable fabric to embroider my label. It's from the new Cosmo Cricket line "Baby Jane". So cute!

Baby Jane fq

I even did a little texty quilting... if you look close here you can see "fcmqg bee".

Oh my stars quilt

Quilty Stats:
Name: Oh My Stars
Measurements: 48"x73"
Pattern: Block pattern from Ellison Lane, pieced by various members of the Fort Collins Modern Quilt Guild in 2012 and 2013. Quilt top designed by SewDemented and myself. Top assembled and quilted with a crazy loopy stipple by me!
Fabrics: Too many to list! But the background is Kona White. Binding is a gray tone on tone chevron from JoAnn. The back is lots of fat quarters from my stash.

Linking up with Amanda from Crazy Mom Quilts for Finish it Up Friday, and Quilt Matters for TGIFF!

Wednesday, July 3, 2013

wip wednesday: still quilting

I find that I can only quilt in short bits of time. I get bored with the repetitive motions and my neck and back get tense. And finding the time is not easy, which is why it's taking for. ev. er. to quilt my "Oh My Stars" quilt. But I like how it's going, despite the snail's pace! I love stippling with loops... it's a very forgiving pattern.

Oh my stars quilting

I have to get some momentum, though, because this thing has to be DONE by next Thursday! I need to finish my hexy pillows by then, too.

Linking up with Freshly Pieced for WIP Wednesday.

  WIP Wednesday at Freshly Pieced

Friday, June 28, 2013

finish it up friday: a giant finish

This quilt has been in the works since March. It took a lot longer than I thought it would.

Untitled

I was commissioned by my hubby's boss to make this quilt. No pressure there!

Untitled

Stats
Measurements: 96x96 inches
Pattern: Granny Square from Blue Elephant Stitches, done with 5 inch squares
Fabrics: A mish mash of DS, random bits from my stash, and Kona Chocolate. Backed in Riley Blake large brown chevron and bound in brown Heath.
Pieced and quilted by me! (with the help of a long arm machine, haha)

Here it is in action on the long arm... oh boy, that was fun!

Untitled


Linking up with Amanda Jean for Finish It Up Friday!

Wednesday, June 19, 2013

wip wednesday: quilting and binding

I've been working on several projects lately: a quilt for my husband's boss, a quilt for a quilt festival in August, and a pillow from the MQG's Madrona Road Challenge fabric which is also for the quilt festival. I'm getting so close on all three projects!

Last Saturday I rented time on a long arm quilting machine and quilted this massive 96" square quilt for my husband's boss. It looks so good! (I loved using the long arm and can't wait to do it again!) The binding is made for this quilt and just needs to be sewn on.

Untitled

This next quilt is called "Oh My Stars", and is pieced from bee blocks made by the members of the Fort Collins Modern Quilt Guild during my months in 2012 and 2013. We used the Starflower block tutorial from Ellison Lane and then I (with ideas and inspiration from my friend Michelle) assembled the top. I really love how it turned out! I also love that I pieced the back from a rainbow fat quarters from my stash. This quilt is being basted right now, and the binding is ready and waiting, too. I need to get on it already!

Untitled

(The punk has a habit of photo bombing.)

Untitled

Last but not least, I'm working on two pillows from the (#itendedlongagoandthesearewayoverdue) Madrona Road Challenge that was sponsored by the Modern Quilt Guild earlier this year. Our guild plans to have a display of things made from Madrona Road at the quilt festival we are showing at in August.

I decided some English paper piecing (EPP) was in order, so I've got these designs basted and ready to be sewn to their backgrounds:

Untitled

Untitled
 
I probably should have at least ironed the solids before taking these photos. Whoops.
 
Linking up to Freshly Pieced for WIP Wednesday!
 
WIP Wednesday at Freshly Pieced

Friday, June 7, 2013

in memory

I've been struggling with this post for a while now... composing random sentences in my head over and over again. I try to keep things happy and light on the blog, but life isn't always that way, as we all know. I feel like I can't move on with other posts until I finish this one.

In April, my dad passed away.

It was a total shock to our family. Some days I still can't believe he's gone.

Since we live in Colorado and my dad lived in Florida, our little family flew down there and stayed for ten days while we were planning his funeral and cleaning out his house. It was so overwhelming, being there when he wasn't. My heart and my mind were so full of emotions and memories that I wanted to soak up and never forget. My dad was a great father. I never doubted his love for me and he supported me in whatever I chose to pursue.

He loved music and art, and he was fascinated by history. He loved travel and often told me stories of things he'd seen around the world. He had an unwavering faith in the Lord and immense knowledge of the sacraments and history of the Christian church.

He loved Emma with his whole heart and delighted in watching her grow and change. It makes me so sad that he won't see her grow up. I'm so grateful that we had a chance to see him about a month before during our annual trip to visit family.

A few days before he passed Emma and I Skyped with him, and I remember their laughter at the silly things he did, and he taught her to tap her nose and say "beep!". She still does that and thinks it's so funny.

I'm so lucky to have support surround me during this time. My husband has been an immense comfort, as have my family and a few dear friends. I see and hear things that remind me of him daily, whether it's things from his house that we brought home or songs on the radio.

I wrap those memories around myself and cherish them. I love you, Daddy.

Friday, April 12, 2013

tutorial: english paper piecing with large shapes

There are a lot of English paper piecing tutorials in bloggy land but I haven't found any that address using larger shapes... until now!

English paper piecing (EPP) is a traditional method to piece a quilt by hand. Fabric is wrapped around paper (or sometimes plastic) templates and basted, and then shapes are joined together to make the quilt top (or project).

EPP is great because it's highly portable and a great project to work on anywhere. I've done several projects with EPP and you can see a couple here and here.

I bought a pack of 3 inch hexagon templates (which means that each side measures three inches) and they seemed massive to me since I'm used to EPPing with 1 inch hexies! I discovered that I needed to use different techniques to wrap the fabric taut enough to get the same crisp lines as a smaller shape and thought I'd share them here.

1. Place the template on the fabric (right side down) and cut parallel to the shape's lines about 1/2-5/8" out. With smaller shapes you can use smaller seam allowances, but with shapes this size it's less of a hassle when you have more fabric to work with. Your cutting doesn't have to be perfect.

Paper piecing
 
2. Using Clover Wonder Clips (or other binding clips), anchor the fabric at opposite ends of the shape. With a 1-inch hexagon I would just pin once in the middle, but here that method created too much distortion in the fabric and template, and also left a lot of fabric hanging with nowhere to go.
 
Paper piecing
 
3. Working with one corner at a time, fold the fabric and use clips to hold the fold. Make sure the fabric is taut (but not stretched) across the template. This might seem like overkill, but it really helps the fabric stay put while you're basting and the shape stays flat, too.

Paper piecing

Paper piecing

4. To baste the shape, take multiple stitches on each side.   In the first picture you can see the knot on the right where I started basting. The second picture is the same shape on the opposite side. Make sure you tack down the corners! A thimble really helps here, too.
 
Paper piecing
 
Paper piecing
 
5. Use the Wonder Clips again when you are whip stitching the shapes together. When they are this large it's too easy for them to shift around. 
 
Paper piecing

I hope that helps! I assumed some knowledge of EPP when writing this, so let me know if you have any questions. By the way, if you're looking for more projects with EPP, Hexa-Go-Go is one book I've really loved!
 
Paper piecing

Thursday, March 28, 2013

quiet book, part 2

As promised, here are the details of the quiet book I made for Emma. You can see the post with all of the pictures here. I looked at many, many quiet books (from Pinterest and the Quiet Book Blog) and made a list of the pages I wanted to make:
  • Front Cover Page (includes Emma's name and buttons)
  • Zipper Page (Emma loves zippers!)
  • Barn and Barnyard (two page spread)
  • Felt doll and dress up clothes
  • Shape Page
  • Color Matching Page (with flowers and snaps)
  • Back Cover Page (embroidered with the year)
I went to JoAnn and chose the polyester felt sold by the yard. I bought a quarter yard of almost every color they had, which was more than enough to cut out the pieces I needed. I did buy two and a quarter yards of the white felt since that is the base of every page. I have enough felt left over for three or four more quiet books, but it was cheap and I don't mind adding felt to my stash. :)

Quiet book

Other notions I bought include buttons, snaps, binder rings, and velcro. (I originally intended to use the buttons on an interactive page but scrapped that idea and used them on the front cover instead.) My embroidery floss stash also got a workout with this project!

My pages are 10x10, but I've seen them made in all different sizes. As far as templates, here is a list of what I used and made:
  • Barn, barnyard, and finger puppets: I used the templates from Sunshine, Lollipops, and Rainbows
  • Felt doll and dress up clothes: I drew a doll inspired by this tutorial and freehanded the clothes.
  • Shape page: I printed some shapes using Microsoft Word and used those as templates. (I did the same with Emma's name on the front cover.)
  • Color matching flowers: Used the template from Sunshine, Lollipops, and Rainbows (link above).
Quiet book tips and tricks:
  • I used scotch tape to tape the templates to the felt and cut around them. They stayed put and it made it really easy to get crisp cutting lines in the felt. I also leave the tape on the paper template, which laminates it in a way and makes it easy to use repeatedly.
  • Label your template pieces before you cut them out! That makes it easier to distinguish them should you want to use them again. I note what the piece is, how many to cut out, and from what color.
  • All my used templates are now stored in Ziploc bags in case I need to replace any pieces or want to make another book.
  • I used a layer of interfacing between two layers of felt for removable pieces. This made the pieces less floppy. (see pictures below)
  • I also used interfacing between felt pages that were sewn back to back. Cut these pieces 1/2 inch smaller than your pages. My pages measure 10x10, so I cut my interfacing 9.5x9.5.
  • GO SLOW when sewing your pages back to back! Pinning didn't work well for me (um, I actually didn't try it, lol) and sewing at a moderate speed produced uneven edges. Sewing slowly ensured my pages looked nice!
  • Binder rings made it easy to bind the pages, and it will be simple to remove/add pages in the future. I originally intended to use grommets but ran out of time (I finished it at midnight the night before our trip, lol) so I just cut little slits in the pages.
For removable pieces: Cut out one piece using template. Embroider/decorate as desired. Layer with the piece on top, interfacing in the middle, and the backing felt (larger than the original piece) on the bottom.

Quiet book

Sew around the piece. Using a piece of felt on the back that is bigger means that shifting will not be an issue while sewing.

Quiet book

Trim away the excess interfacing and backing felt.

Quiet book

Monday, March 25, 2013

quiet book, part 1

When we fly with Emma I like to bring something new to entertain her. Last year I made one of those little taggie blankets with bits of ribbon sticking out on all sides.. she loved that! This year, though, we need something a bit more interactive. It also needed to be relatively quiet and not a hundred pieces, since we'd be on a plane in tight quarters.

I went back through my Pinterest boards and looked for something she might like. I had pinned a quiet book a long time ago and went back to the link at Sunshine, Lollipops, and Rainbows to check it out again. It met my requirements and looked like something Emma would enjoy!

Here are the pictures of the quiet book I made. I have more details about how I made the book coming up in another post.

Front cover

Quiet book

Dress up doll

Quiet book

Quiet book

Snappy flowers

Quiet book

Quiet book

Zippers

Quiet book

Shapes

Quiet book

Barn

Quiet book

Barn with doors open, and the barnyard

Quiet book

Back cover

Quiet book

Emma and the quiet book in action on the plane

Quiet book