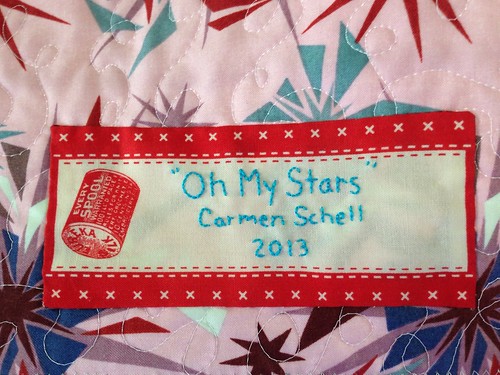
I wanted to create a special label for the quilt I'm submitting to the quilt show in August. This isn't something I'd do for every quilt I make, but this one deserved special treatment.
Materials:
- solid fabric for label or preprinted label (My finished preprinted label is 4" x 2". You can make your label any size you choose. Don't cut this out of your fabric quite yet, leave it a bigger piece so it will fit in your embroidery hoop!)
- freezer paper to fit
- iron
- scrap paper and pencil (or computer and printer)
- disappearing ink pen
- embroidery hoop (mine is 7 inches)
- embroidery floss
- needle
- scissors
- ruler
- rotary cutter
- cutting mat
2. Iron freezer paper on the back of your fabric. This will stabilize your fabric so you can write on it. Be sure you lay the shiny side of the paper against the wrong side of the fabric! Otherwise you'll have a mess on your iron.
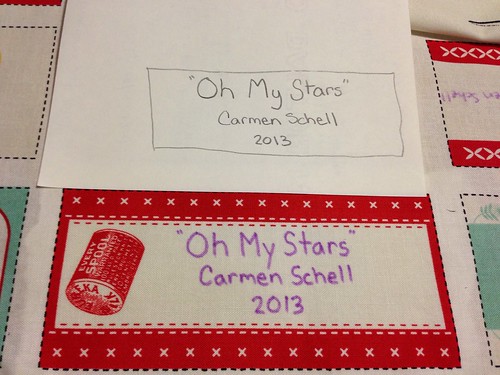
3. Using the scrap paper and pencil, draw an outline of your label and practice what you want to write. This helps you play with centering words and placement.
Alternatively, you can print something out on your computer to trace if you don't want to embroider your handwriting. (If you plan to trace you should use a lighter color fabric so you can see what you're tracing through the fabric.)
4. Once you've decided how you want your label to look, use the disappearing ink pen to write on your fabric, using your scrap as a guide or tracing your computer generated piece. (Note: you'll need to embroider soon after writing on your fabric because that disappearing ink goes away within a day or so!)
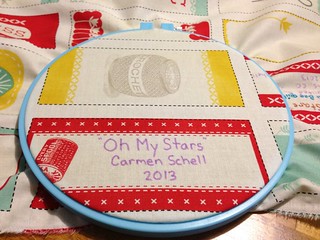
5. Remove the freezer paper from the back and place the fabric in an embroidery hoop. You can reuse the freezer paper, save it!Separate three strands from your embroidery floss and knot one end.
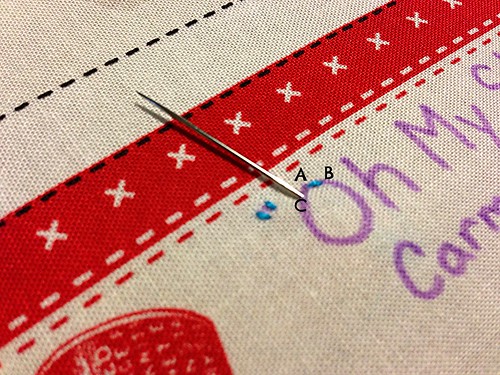
I used a simple back stitch to embroider my label. I've labeled the picture below to show you the back stitch: Bring the needle up from the back at A, down at B, and back up at C (where you see the needle coming out). To complete the next stitch you would go down at A and come back up past C.
6. After you embroider your label, press out the wrinkles from the embroidery hoop. Then, using a ruler and rotary cutter, cut it out using a 1/4" seam allowance on all sides.
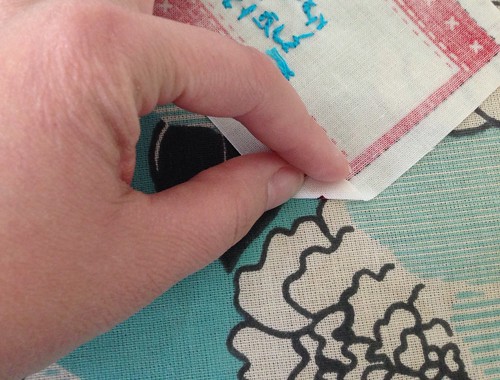
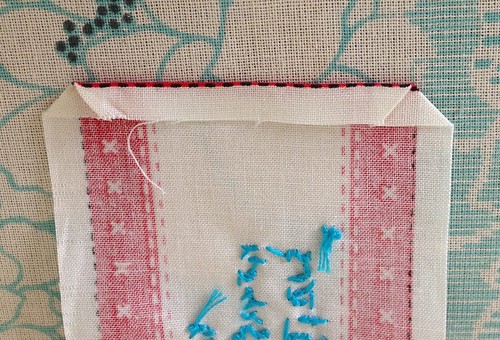
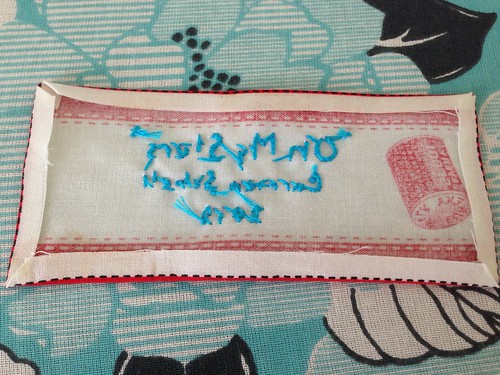
7. Fold the corners over to the back and press down. Then fold the sides in and press, using starch.
8. Pin the label to the quilt back and whip stitch or use an invisible ladder stitch to secure it. There are many tutorials online for the ladder stitch, Google can help! Make sure you only go through the label and the quilt back, not through the front!
And there you go!
For other quilts I might use the same process but omit the embroidery, instead using a Sharpie or Micron pen to write on the fabric. It does take time but it's worth the effort!






So cool that I saw this on Pinterest!! I love the label! :)
ReplyDeleteThanks for sharing! This is a great tutorial!
ReplyDeleteCarmen, this is lovely!! I am so impressed, i don´t even just print labels let alone stich them so beautifully.. Wow, great job! So good to "find" you on the internet :-)
ReplyDelete