I love Fridays. I don't have school (our Kindergarten program runs Monday through Thursday) which means that Friday is my day to run errands, have doctor's appointments, or be lazy. Today, I lunched and shopped with a friend and on the way home I decided to drop in at my favorite thrift store in town.
I'm so glad I did!
I'm always on the hunt for Pyrex in good shape, and I hit the jackpot today... look at these beauties!
I haven't found any decent Pyrex in a long time, so I was super excited to find three pieces today. There were two other pieces on the shelves, but I only buy pieces I really like. Yay for Pyrex!
Friday, April 29, 2011
Tuesday, April 26, 2011
easter goodness
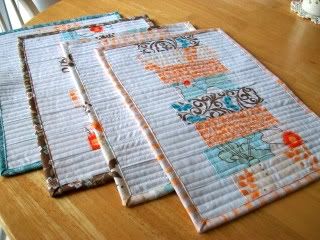
I started these placemats way back in November, and like most of my projects, they languished untouched for several months before I came back to them.
I can't remember where the inspiration for them came from, it was a magazine that's hiding somewhere in my house.
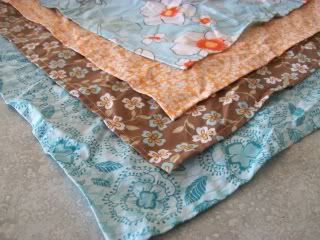
I used a jelly roll from JoAnn for the prints and the binding, and matching fat quarters for the backings and napkins.
At our March Quilt Guild meeting, we made napkins, and I used a simple tutorial for hemming the edges and mitering the corners. (Actually, the tute was Greek to me until Jane explained it. Thanks, Jane!)
(probably need to iron them before using them!)
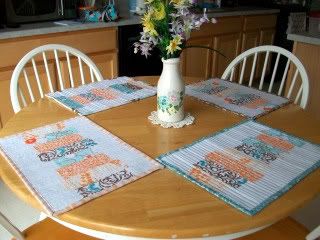
Our Easter placemats looked great on the table!
Saturday, April 23, 2011
butterfly wreath
I've seen yarn-wrapped foam wreaths all over the internets, and wanted to make one for the baby's nursery. You can see variations here and here.
I've sort of developed a bit of a butterfly theme in her room, but don't tell my hubby because he'll think that's WAY too girly. :) At any rate, I decided a butterfly wreath would be very sweet on her wall.
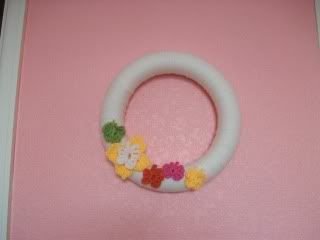
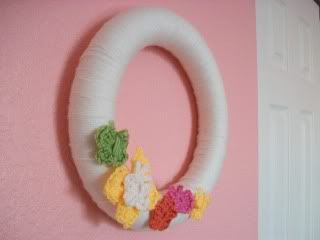
I wrapped a 12 inch foam wreath with white yarn, and set about crocheting butterflies. I had a hard time finding a pattern that I really liked. The first one looked too much like a flower,
and the second one was only okay.
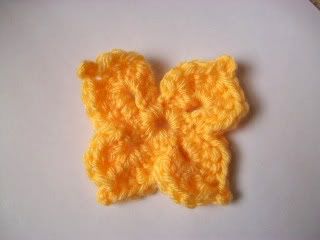
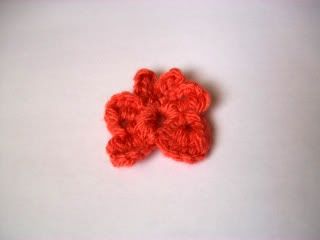
This one came close, but it still wasn't perfect. So I tweaked it, and this is what my version looks like...
... and here is the pattern for my version. This is based on this crochet pattern, but it has some definite differences!
Ch 6, join with sl st in 1st ch to form ring.
Ch 5, tr, ch 1, hdc, ch 1, tr, ch 5, sl st in ring.
*Ch 5, sl st in each ch and into ring. Repeat from * once.
Ch 5, tr, ch 1, hdc, ch 1, tr, ch 5, sl st into ring.
Fasten off and weave in ends.
I really like how the wreath turned out!
Labels:
baby,
bloggy love,
crochet,
other crafts,
tutorial or pattern
Thursday, April 21, 2011
spring retreat {potholder swap}
I forgot to mention a crucial part of the retreat!
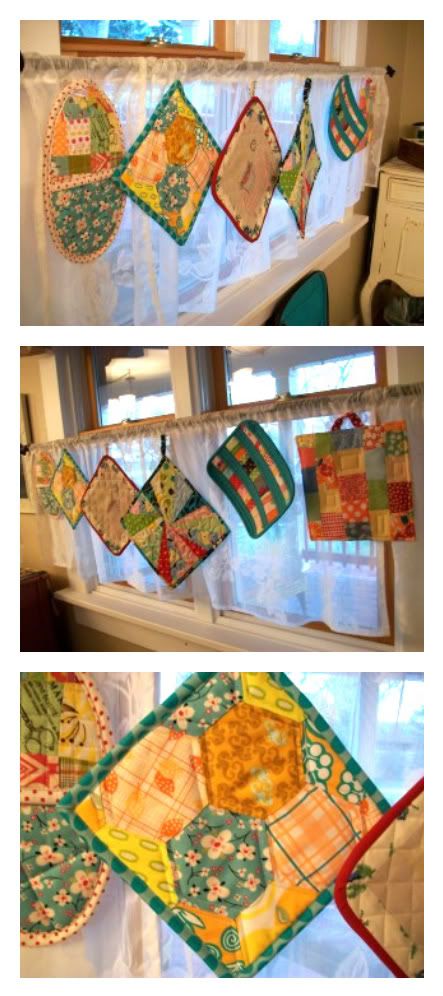
We had a sweet little potholder swap. All the potholders were hung on the curtains to be admired... mine is the hexagon one. Shocking, I know.
On Sunday after breakfast we drew names and numbers, and I got to come home with this adorable potholder, made by Melinda! It hangs in my kitchen in a place of honor, and I love the cheery colors!
Tuesday, April 19, 2011
spring retreat
People. My quilting world has been blown WIDE open.
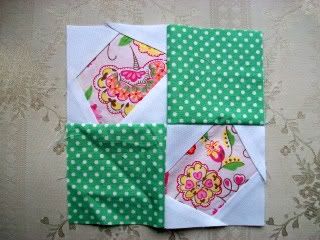
I spent this past weekend at another fabulous quilting retreat at the Inn at City Park, hosted by the wonderful Tara (she puts in so much time and effort to make things awesome!). I had fun learning to paper piece and improv piece blocks. In all honesty, I really thought I would stink at both, and possibly be the worst student poor Penny has ever had.
Fortunately, she's a great instructor and her workshops were informative and challenging. Here are a couple of paper pieced blocks I did as practice:
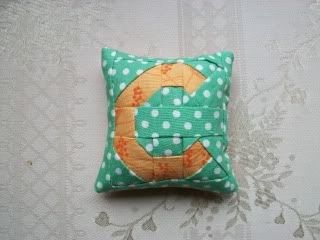
We all paper pieced the first letters of our names and turned them into pincushions. I really love how mine turned out! Plus, guess who had the most complicated initial? Yep. Lucky ol' me.
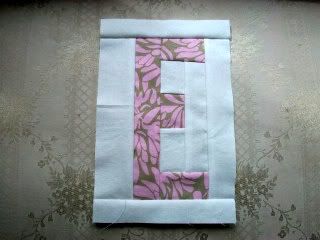
I also paper pieced a letter "E"... can't tell you why, yet! But I can tell you that I enjoy paper piecing and I definitely want to do more of it!
But then. THEN we talked about improvising blocks of our own design. This is where the blown wide open part comes in. Are you ready? Can you handle it?
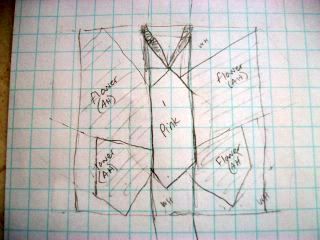
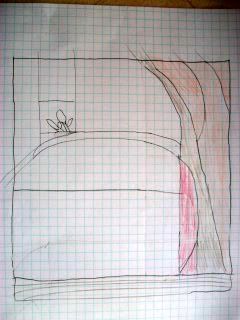
Ha. I know I'm being dramatic, but I had so much fun! I started out by sketching a cute little butterfly for a wall hanging in the baby's nursery.
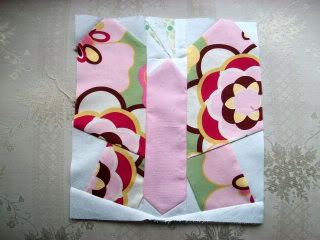
And then, I made it.
How awesome is it that my finished block actually LOOKS like the sketch?? I think that's the part that astounds me the most.
My second improv block was equally fun. I began by sketching a tree...
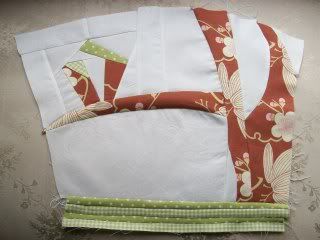
...and then piecing it. This one was more complicated for me, and I really didn't know how it would turn out.
It's not perfect- there are some puckers, and the little twigs off the branch aren't exactly like the sketch, but overall I'm really happy with it. Originally I thought I'd square it up and frame it for the nursery, but I kinda like the wonkiness of the sides. I might quilt and bind it for another wall hanging. I even have a little applique birdie in the works!
After seeing blocks like these, I never thought that creating my own was possible, at least for the near future. After all, I am a fairly new quilter, and most of my stuff (okay, all of it) has been squares and rectangles. But this weekend taught me differently! (Cue inspirational music.)
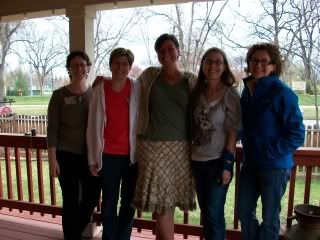
Oy. Things are getting a little too mushy for me. And I still haven't mentioned the great group of ladies I got to quilt with... from L to R it's Melinda, Amanda, Tara, Audrey, and Penny. (My photo is dark and I wasn't able to fix it. For a better photo, go to Amanda's blog!)
There was plenty of sewing, lots of laughter, excellent food, and a fabulous goody bag. A great time was had by all!*
*See, Tara and Amanda? I told you my post would be miles long. :)
Friday, April 15, 2011
at long last!
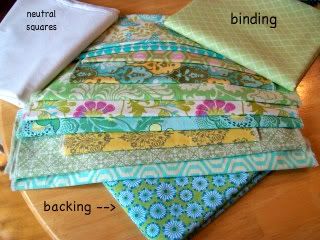
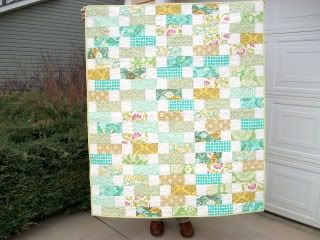
I finally, finally finished my "On the Road to Spring" Quilt Along quilt. Mia and Nancy finished theirs a long time ago, but I got stuck. Piecing didn't take that long, but I ended up hating the original backing fabric I chose.
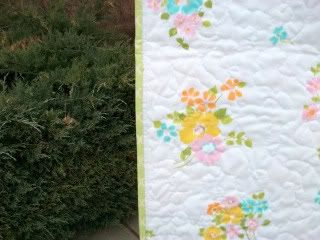
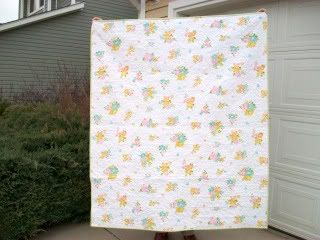
When the right fabric came along in the form of a vintage sheet from a thrift store (close up below), I was scared to quilt it because I loved the quilt top so much!
Then I decided to just quilt in straight lines with my walking foot because I was scared of free-motion stippling, but stopped because that was too boring.
At long last, after I finished these two quilts, I felt confident enough in my free-motion skills to just quilt the darn thing. I'm so glad I did! I really love how this quilt turned out.
When the right fabric came along in the form of a vintage sheet from a thrift store (close up below), I was scared to quilt it because I loved the quilt top so much!
At long last, after I finished these two quilts, I felt confident enough in my free-motion skills to just quilt the darn thing. I'm so glad I did! I really love how this quilt turned out.
I absolutely love this quilt. I think I've mentioned that... plus I spend more time petting it than actually using it right now. :)
Thursday, April 14, 2011
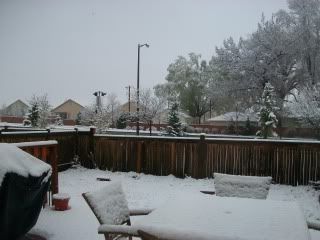
spring, why dost thou torture me?
This is what we woke up to this morning:
ARE YOU KIDDING ME?
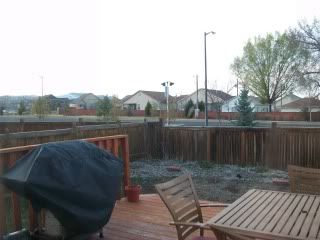
And this is what I came home to this evening:
Snow's melted, but the whipping wind makes it cold. And difficult to walk outside.
See those trees on the other side of the street? I swear at least ten times a year that those trees are going to blow over. But they never do.
Spring supposedly sprung (sprang?) several weeks ago... could've fooled me. Weather in Colorado is consistently inconsistent. I could count on stuff in Florida: hot, humid, sometimes rainy. In Colorado, the forecast doesn't mean anything. It changes every five minutes.
We have a field trip to a farm scheduled for Tuesday. I'm really, really nervous about the weather!
Tuesday, April 12, 2011
the nursery {painting} and baby update {23 weeks}
We've started on the baby's nursery! Well, my husband, mom, and stepdad started on the nursery. I got kicked out because of primer and paint fumes.
We have three bedrooms in our home... our bedroom, the guest room, and what we lovingly call the "crap" room... half craft room, half office, half storage, half junk. We decided to make the crap room the new guest room and the "old" guest room is now the baby's room.
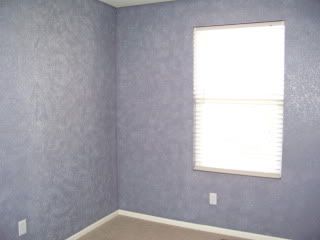
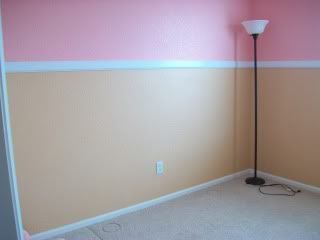
Last Friday night Hubby switched the rooms and cleaned out the new nursery. This picture is from before we moved in... the walls were a deep blue with some sort of white or gray sponge painting over it.
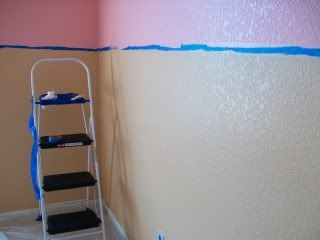
Saturday, my mother and stepfather came up to help paint and install the chair rail. We chose pink for the top and a tan for the bottom, with the chair rail being higher than average at about 55 inches. We dubbed it the "chin rail". Guess whose chin it's at? Yep. Mine. I'm short.
Painting went really fast, considering they had to prime it and paint two colors. The chair (chin) rail went up Sunday morning. It looks great!
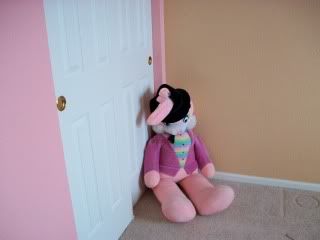
And Big Bunny is ready to greet Baby!
We ordered the crib and dresser, and they should come in the next week or so. I also picked up a cute piece of artwork that incorporates the alphabet and I'm working on a couple of projects that will go up on the walls. Hurray!
Now for the update:
Baby is kicking like crazy! She's moving all around and doing somersaults in my belly.
I've been feeling really good... my energy is back, which is good because as the end of the school year approaches I'm going to need it!
My craving for milkshakes and cereal has diminished. I had gained four pounds at my last doctor's appointment three weeks ago, and I'm pretty sure one was Baby and the other three were milkshakes. :)
You know what's funny? Every time the baby kicks, I yell for Hubby to run over and put his hand on my belly so he can feel too. Problem is, she stops kicking! Poor Hubby, he hasn't been able to feel her yet.
My stomach looks HUGE to me when I look down and see it sticking out, but in pictures it doesn't look that big. Some people at work who didn't know I was pregnant were tiptoeing around, asking other people so they didn't offend me in case I was just getting fat, lol.
Monday, April 4, 2011
spring break wrap up
This past week was my Spring Break. I didn't know how much I was looking forward to it until it was actually here! I spent the week quilting, crocheting, relaxing, napping, lunching with friends, and thrifting. Doesn't that sound lovely? (It was!)
Anyway, I set myself a deadline of finishing the two baby quilts I had started, as well as working on my quilt along quilt (I am so embarrassed that I haven't finished it yet, I'm not even going to link to the old posts about this quilt!) and any other projects I could find that were unfinished. Trust me, there are plenty stashed around the house.
I'm very proud to say that I accomplished my goal! Both baby quilts are done and with their intended recipients. I also got over my fear of free motion quilting with these quilts, and decided to abandon the straight line quilting I started with my quilt along quilt in favor of the free motion quilting. That's going slowly, but well.
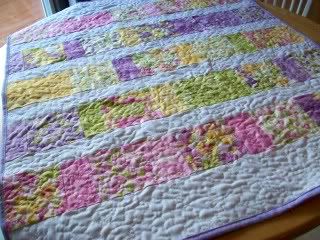
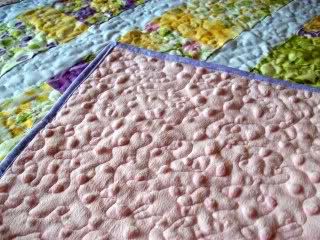
This is the first quilt I finished. I used Eden by Lila Tueller for Moda:
(backed with pink minky dot)
And for the second quilt, I used It's a Hoot by Momo for Moda, and backed it more fabric from the same line:
I'm loving both quilts, and I love even more that I actually finished them!
One thing I've contiually debated since I began quilting... do I pre-wash the quilt before I give it? I'm torn over this. I haven't pre-washed any of the quilts I've given so far.
I also used my machine to bind both quilts, and it was so easy! Finishing by hand is easy, too, but takes so much longer to do.
Friday, April 1, 2011
guest posting today!
What a fabulous way to end my Spring Break... I'm guest posting over at sewtakeahike today! Head on over for tips about quilting with minky. If you've just arrived from Penny's blog, welcome! Browse around and leave some comment love, and happy Friday to you all!
Subscribe to:
Comments (Atom)


